System Preferences in macOS, Sierra: Time Machine

eXtensions - Thursday 27 October 2016
|
System Preferences in macOS, Sierra: Time Machine |
|
|
|
By Graham K. Rogers
It is therefore now possible to view the Time Machine "Infinity" display whenever the Dock icon is pressed, once a Disk has been specified and set up. However, with no disk connected only limited recovery may be possible, if at all. With Mountain Lion another useful option appeared - the ability to use more than one disk for backing up. This makes it possible to back up a computer using disks in different locations for better safety.
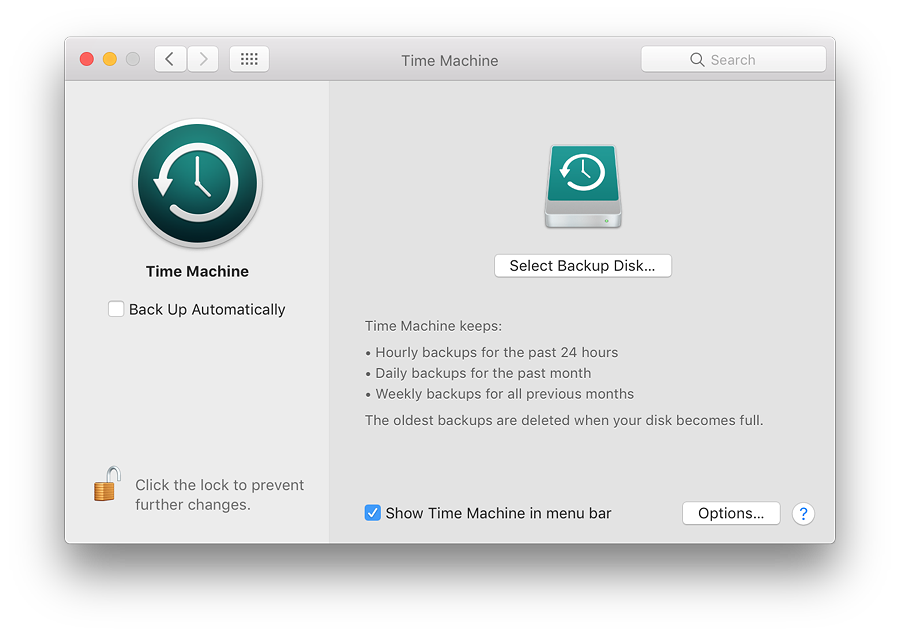
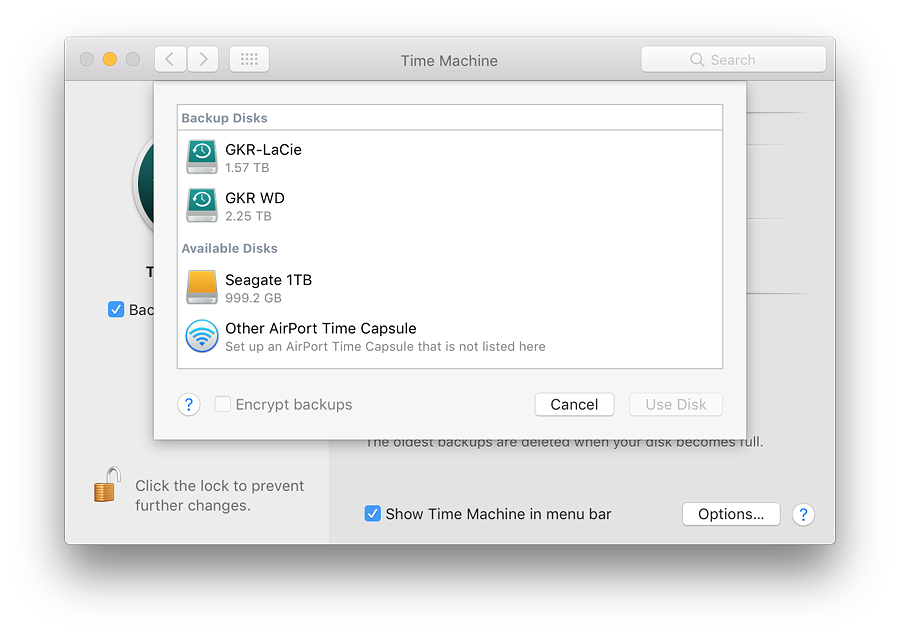
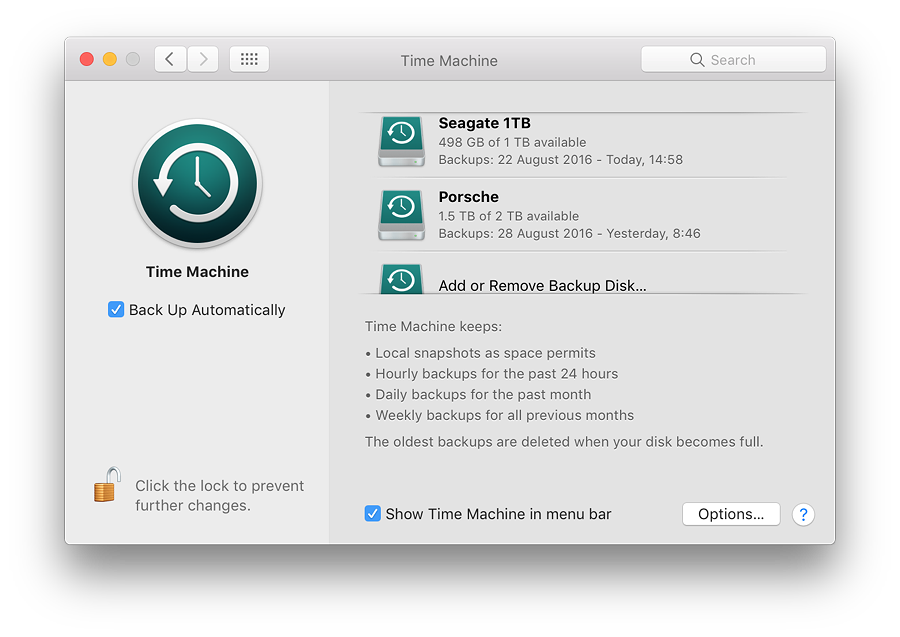
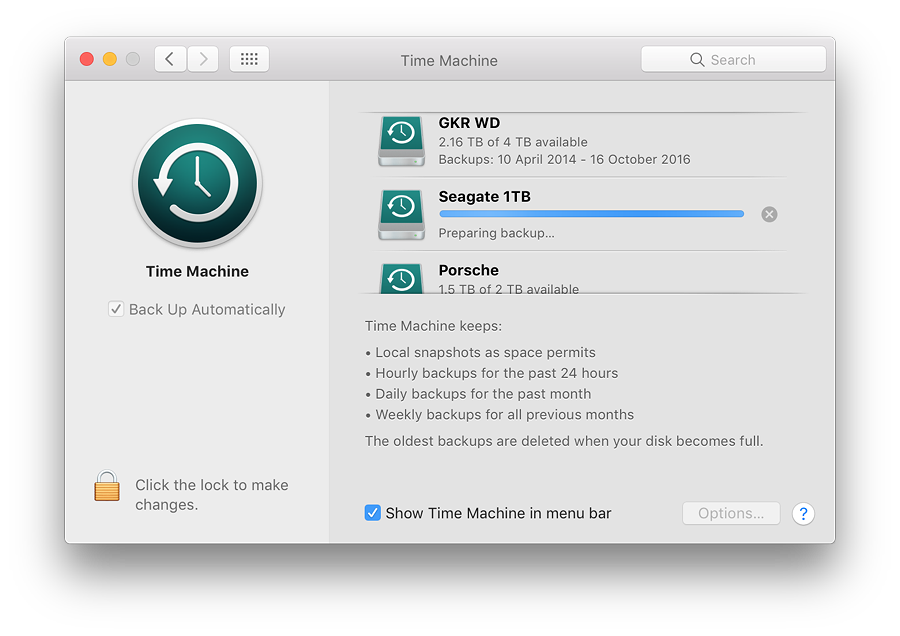
Setting Up (1)When Time Machine is first opened on a new installation there are two parts to the panel displayed: to the left is large Time Machine icon; to the right the main information display area. Initially, the larger part of the panel will have a Time Machine disk icon above a button marked Select Backup Disk.In this original setup condition, the main panel has a revised text description of the feature. At the bottom is a check box for display of the icon in the menu bar: this menu bar icon provides other controls when active. These are related to the Preferences, but are not identical. There is no longer an On/Off button as in earlier versions. Initial setup is done using the Select Backup Disk button. Any additional disks are then setup using the Add/Remove button at the bottom of the list disks in use (see below). This reveals a panel in which a user may highlight a suitable disk for backups to use. Initially this also has an icon for Time Capsule - Apple's hard disk and Wi-Fi combination. Any suitable hard disk attached will also become visible.
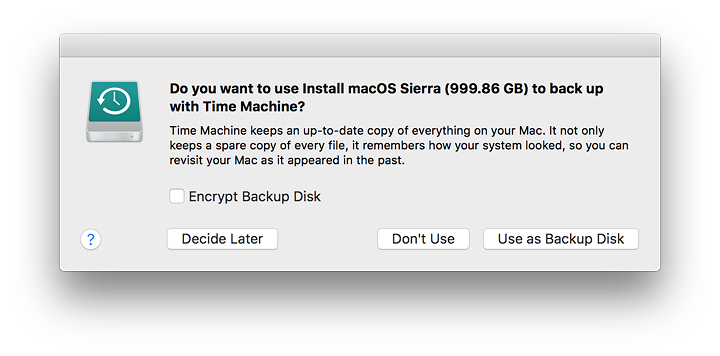
A new feature is revealed when a suitably formatted disk is connected for the first time. A panel appears offering to add this to the Time Machine list of backup disks. A checkbox on that panel also allows the backup to be encrypted.
Any new usable disk connected is recognized. It may be highlighted and the button changes to Use Disk. If an Airport router or Time Capsule device is available, that button changes to Set Up and opens the Airport Utility. The panel revealed when selecting a disk for the feature will depend on the type of computer: a notebook, for example, will have a checkbox to allow use of the backup disk when using battery only. That window is also revealed by pressing the Options button at the bottom of the main Time Capsule panel (see below).
While Time Capsule is ready to run, a hard disk purchased from a store will probably need to be partitioned. However, while most disks in the past have been formatted ready for Windows systems, a few are now arriving ready formatted for macOS use. I never trust a disk out of the box and always format as a matter of course. The ability to use more than one disk offers a number of possibilities, such as backup disks in separate locations; or an easy transition from a full disk to its replacement.
Setting Up (2)The main panel now has a single button, marked Options. This reveals a panel with some extra features. We may prevent backing up of specific items (e.g folders, files) by use of a + icon below the main window, marked "Exclude these items from backups" (the - alongside will remove list items).
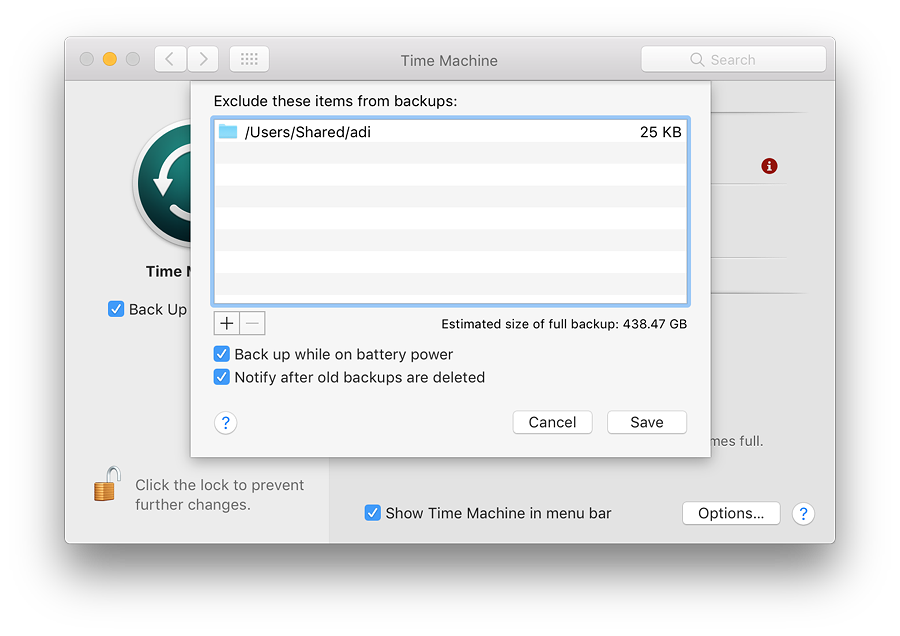
Two checkboxes at the bottom of the "Exclude" panel are marked "Back up while on battery power" (not on desktop computers); and "Notify after old backups are deleted." As the disk becomes full, so the earliest backup will be removed to make room for the current ones. This is a warning that it is time to obtain a new disk.
Backing UpA disk can be used to backup more than one Mac, although space will obviously become a consideration sooner or later. Backup files are stored on the external disk in a Backups folder. Inside that are separate folders for each Mac.With two Time Machine backup disks at home, I also have a disk at my office, so I alternate use of these. However, when using the Time Machine icon in the Dock to access older backups or files, only those backups that are available on disks that are attached at the time the feature is used will be accessible.
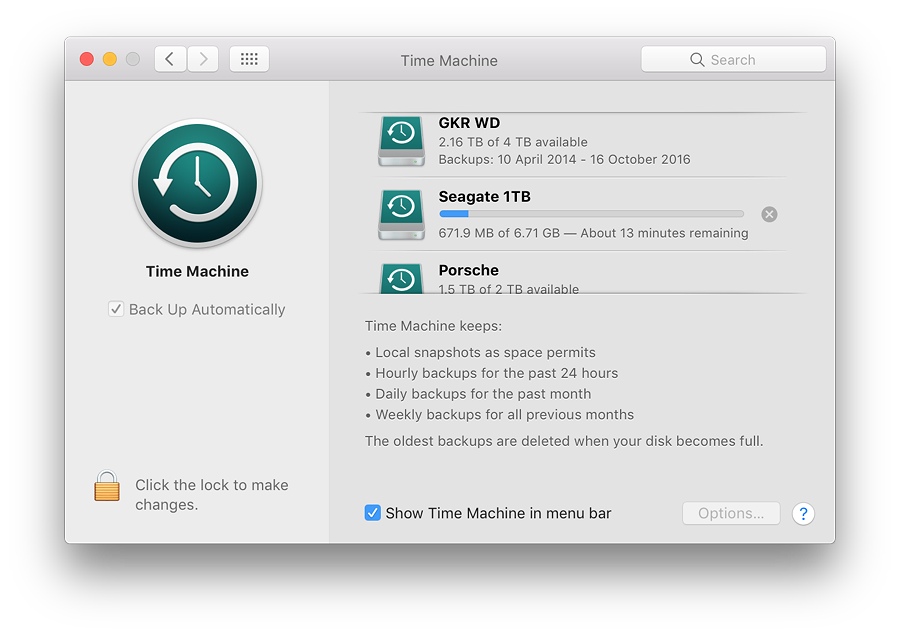
In earlier versions of OS X, whenever the disk was connected, the entire system was backed up every hour, every day and every week. Time Machine does not create a total clone. Any changes are recorded and Time Machine uses those for an incremental backup. The preferences panel does not have to be open for backups to occur. To force a backup, we can use the Backup Now item in the Dock or the menu bar icon menu. If a backup fails, information appears in red, with the letter i in a red circle alongside. The "i" can be clicked on to reveal more information about the problem. Trying again (or perhaps a restart if this is persistent) should clear the problem.
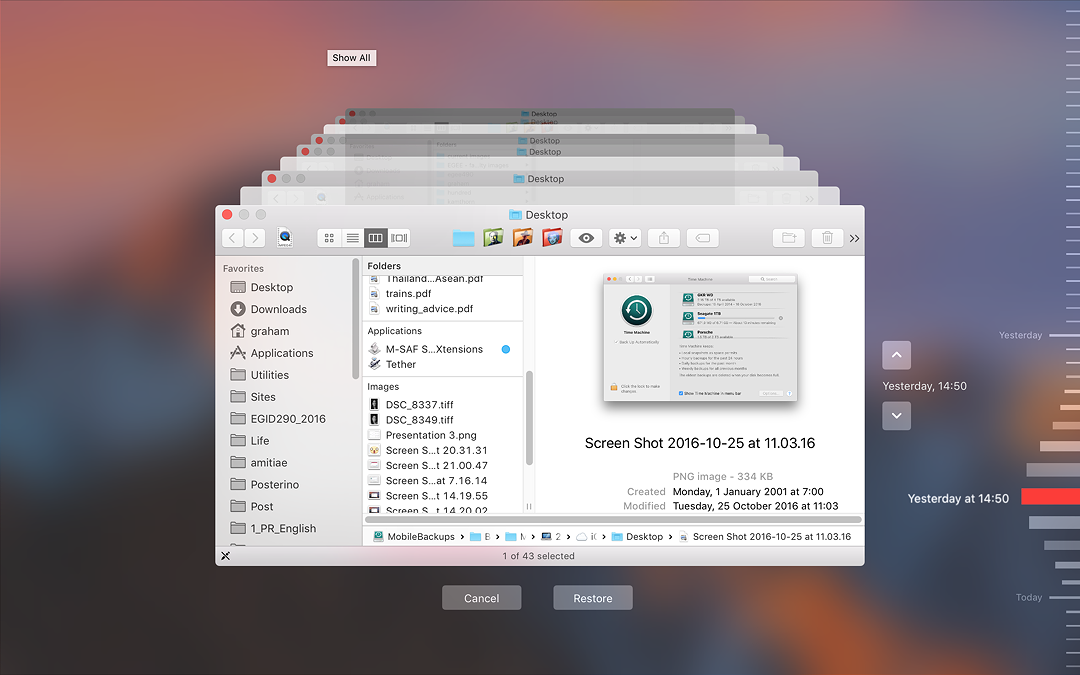
RestoringTo return to a previous version of a file or folder, we access Time Machine via the Dock (or the menubar) icon. This brings up the "Infinity" window (above) and we may select a file from the Finder panel and a time: either by using the control to the right, or by clicking on the receding panels.When a file is located we may click on Restore and the file will be moved to its earlier location. If a file of the same name already exists in that location, we are given the option to rename the file, or to save it elsewhere. This feature works best when a disk is attached, but it will function up to a point without. In testing I have been able to return to previous file backups with no Time Machine disk attached. Even this can be a lifesaver, for example with a version of a file, or an item that was accidentally put in the Trash.
This may also be done on a computer that already has macOS installed. Time Machine will replace all data, including settings and accounts. There are several warnings to inform us that taking this step will replace all the contents of the selected volume before this takes place.
NotesDespite the availability of Time Machine and a number of other backup solutions, I am often reminded that people do not regard this as a necessary part of everyday computing. My students laugh when I ask about backups and others I know are not convinced of the need to take the time. It is usually something that happens to other people.I have had a burglary, two disk failures (different computers and 3 years apart) and in all but the first, I was able to recover. More recently, while testing macOS, I caused irrecoverable problems to the installation on a couple of occasions. In the first disk failure, Time Machine helped me switch from a 15" to a 13" MacBook Pro and then when the repair was effected, back to the 15" - I hardly missed a beat and lost no data. With the more recent installation problems, I recovered the system in about an hour. There are frequent tales of stolen or lost computers (same thing really), broken machines, files over-written, accidental deletions and other causes of lost data. A backup plan is essential.
See Also:
Graham K. Rogers teaches at the Faculty of Engineering, Mahidol University in Thailand where he is also Assistant Dean. He wrote in the Bangkok Post, Database supplement on IT subjects. For the last seven years of Database he wrote a column on Apple and Macs. |
|

For further information, e-mail to

|
