System Preferences in macOS, Sierra: Sharing

eXtensions - Friday 14 October 2016
|
System Preferences in macOS, Sierra: Sharing |
|
|
|
By Graham K. Rogers
DVD or CD SharingNew Macs no longer have optical drives, so a sharing option - like the CDs & DVDs preferences - is no longer available.With the shift to Wi-Fi downloads of applications and macOS, such an option may no longer be needed on newer machines.
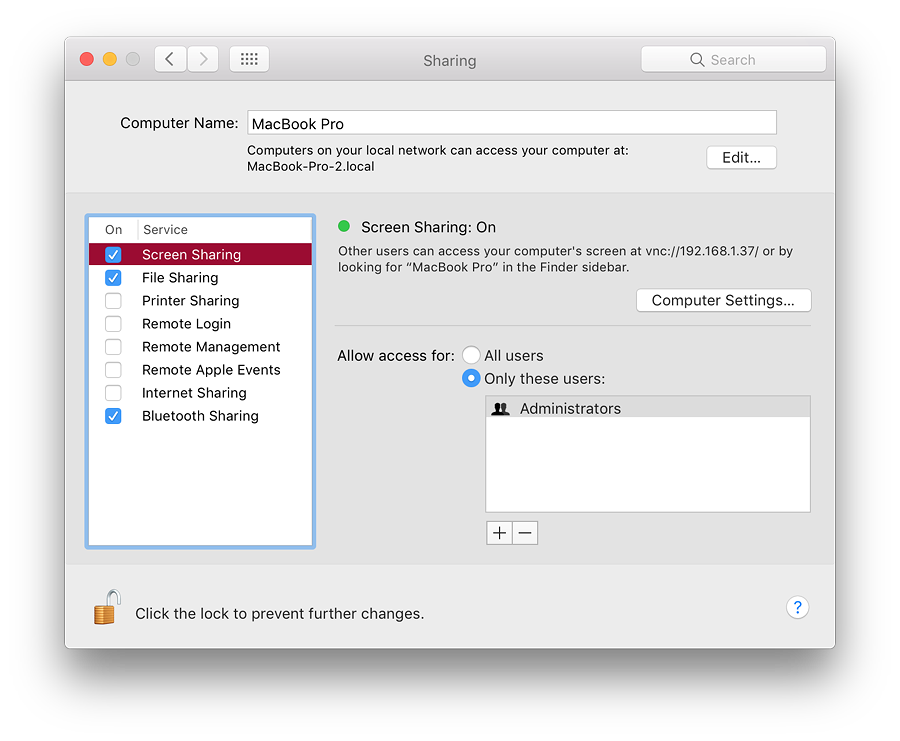
Screen SharingScreen Sharing is a form of virtual network computing (VNC). I can work on another computer on my home network that has this activated. Remote Internet access is possible, although this means some careful manipulation of settings if a router intervenes because of the different IP numbers allocated by an ISP and the router.
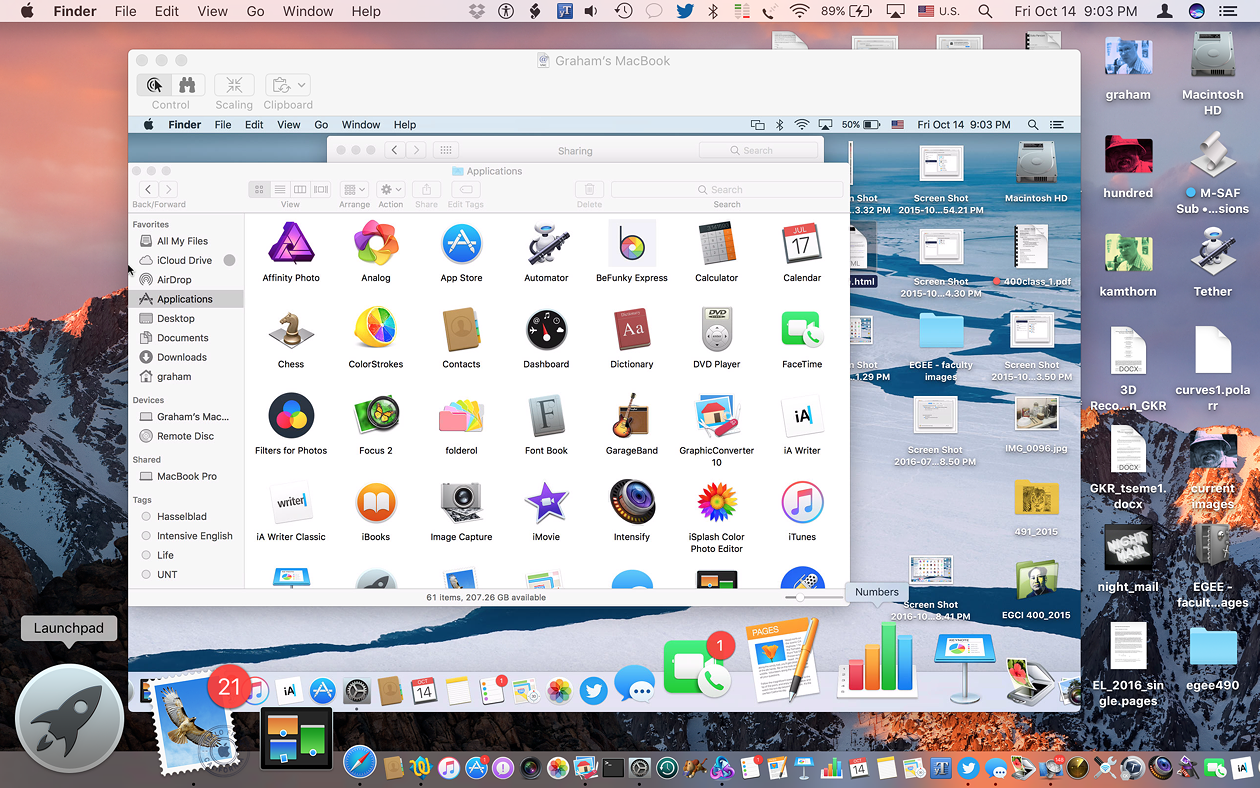
Controlling a MacBook from the MacBook Pro
It is also possible (and easier perhaps in some cases) for a user to access a remote computer using the feature, Back to my Mac, that can be turned on in iCloud Preferences. One purpose of such remote access is to assist another user by working on the remote computer, for demonstration or diagnosis. Anyone who has tried to advise someone on the telephone about what to move, what to open, what to trash, will realize how hampered we are by the lack of visual input. Moving the cursor for the other user, opening the correct panels, is more effective. It is now possible for files to be dragged from the target screen to the desktop. It is also possible to send a file to the target computer. An example might be an image of settings to allow comparison by the second user. Airdrop is also an option if two computers so-equipped are being used, but that would only be for those on the same network. To stop the connection we use the Screen Sharing menu and deselect the checkbox. The Dock icon may also be used: select Quit. See also Remote Management (below). I normally keep this Screen Sharing unchecked (in Sharing and in iCloud) for reasons of security and to access the feature only when needed. For simple file transfers between computers, I prefer to use the Public folder (see below) or AirDrop.
File SharingFile Sharing activates what Apple calls the "Public Folder". Files placed in here can be seen by all users on the network. The Public Folder also contains a Drop Box in which users place files. The contents will not be visible. This is to prevent another user examining private communications that use this method: once in, only the account owner can use the file.
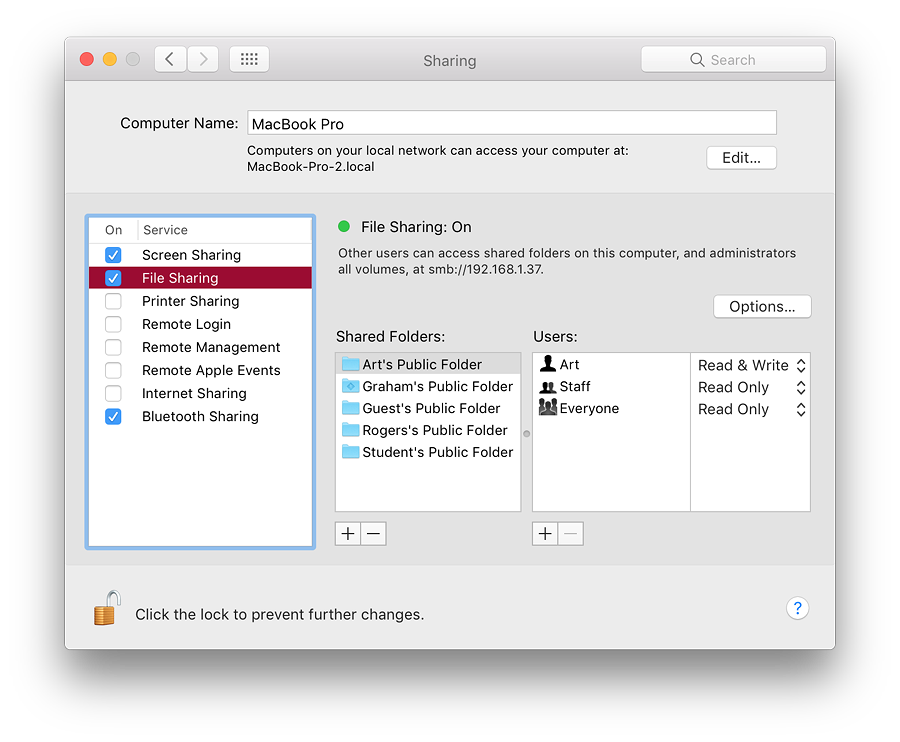
The main panel lists the users and the type of access (Read & Write, Read Only, Write Only). It is possible to add new folders, new users and new groups using the + icon below (the - is for removal). Spotlight was shown as a User in the list in earlier installations with Read Only access. This is no longer listed on my installation.
Printer SharingEarlier, my home office was upstairs, but I tended to work downstairs. However, when I had a printer I did not want to carry it down when working, nor did I want the clutter of a second printer.Printer Sharing allows users to have a single printer, for example attached to an iMac using USB and to print via the LAN. In that situation, the Printer Sharing option is turned on for the iMac. A button to the center and right of the pane allows direct access to the Printers & Scanners preferences panel. Two data panels list any printers that have been connected. More may be added using a checkbox. The second panel lists those who are allowed access. In my case, Everyone is shown, but I may add a specific account or user (or other) using the panel revealed by pressing the + icon.
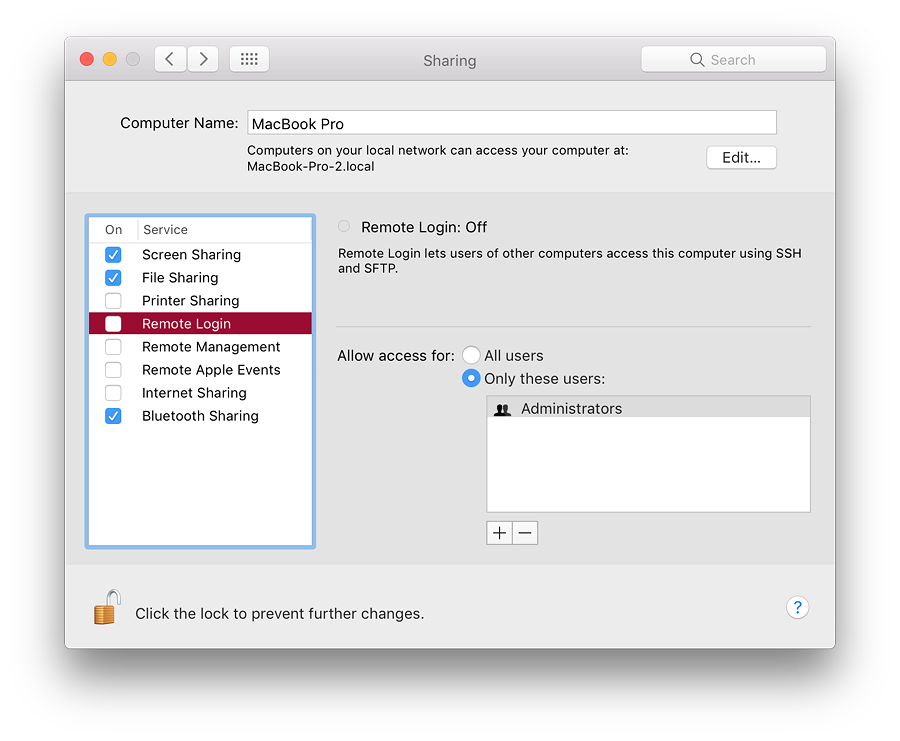
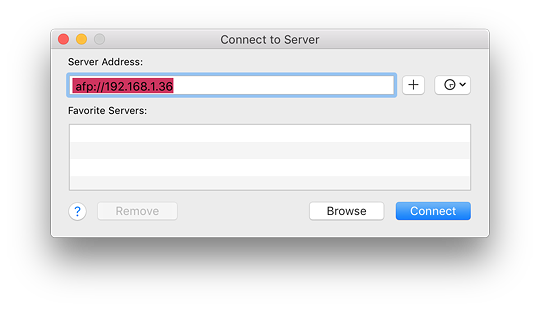
Remote LoginRemote Login works with the Finder. It is similar to File Sharing. When active, a user can log in to the computer from another on the network. There are overlaps here with other types of sharing, such as Screen Sharing (above).
Remote ManagementRemote Management works in conjunction with the Apple program, Remote Desktop. This helps those running a network of Macs, such as in a school Lab, to control the functions of those computers from a master computer.When Remote Management is first selected, a panel is opened automatically (it may also be seen by pressing the Options button) that allows a user to select certain functions. This supersedes Screen Sharing which is disabled if Remote Management is selected. A button in the top half of the information screen is marked Computer Settings. This reveals a panel with several options, including Screen sharing items. There are three checkboxes:
Four boxes below allow entering of computer information for display in a System Overview report. Like Screen Sharing, in the lower section of the information panel a user may select to allow either All or Only specific users to be granted access. Users can be added or removed using + and - icons beneath the user-list panel.
Remote Apple EventsRemote Apple Events is not a way to track announcements from Cupertino about new products, but, according to the preference pane, "Allows applications on other Macs to send Apple Events to the user's computer."Events can be initiated by programs or Apple Scripts and are a way to use the resources of one computer from another, such as shutting down or opening a file. A simple example from the past is the command to print (this now has a specific Sharing panel). This type of feature would be more common in an office where several Macs are used and the sharing of data and resources is integrated into operations. A 2006 document on AppleScript by William R. Cook et al (available online as a PDF), contains several pages (9-13) that may provide some useful background.
Internet SharingInternet Sharing can be useful if a home has limited networking resources: for example a router with a single port, or a computer with no wifi. It is useful also if the internet is inaccessible by normal means. This has been updated with the arrival of the Personal Hotspot feature on iOS devices. When this is activated, a warning panel appears concerning disruption to a network if this is unauthorised.Input to a computer can be from one of a number of sources. On my MacBook Pro options are: iPhone, Wi-Fi, Thunderbolt FireWire, Thunderbolt Bridge, Bluetooth PAN. Ethernet may also be available for those users whose computers have these ports. Older computers may also have a Firewire option. Internet Sharing cannot be turned on until a specific output port (or method) is selected.

Note: When the Personal Hotspot feature of an iPhone is used and the WiFi icon in the menubar is used to connect to that device, the Internet Sharing panel does not change when a connection is made. A possible scenario is that a computer with no wifi can be connected to a machine that has a wifi antenna (data in) using a direct Ethernet cable. Also, in the past, when I was testing a computer with wifi, but had no spare cable in the room I was using, I could connect my computer to the router with an Ethernet cable and then create a wifi network on that Mac that the second computer could link to. More up to date, for some users of course, is the use of iOS devices and turning on Personal Hotspot. The Mac will link to this and it behaves like a Wi-Fi network.
Bluetooth SharingBluetooth Sharing covers the downloading or uploading of files from devices equipped with this feature. This panel was redesigned in Mountain LionThere are two main parts to the panel. The top section deals with file transfers and has a button with options about actions to be taken (Accept and Save, Accept and Open, Ask What to Do, Never Allow). A second button enables the selection of a folder for transfers. The default folder is Downloads, but there is an option for Other, allowing a user to select any suitable location.
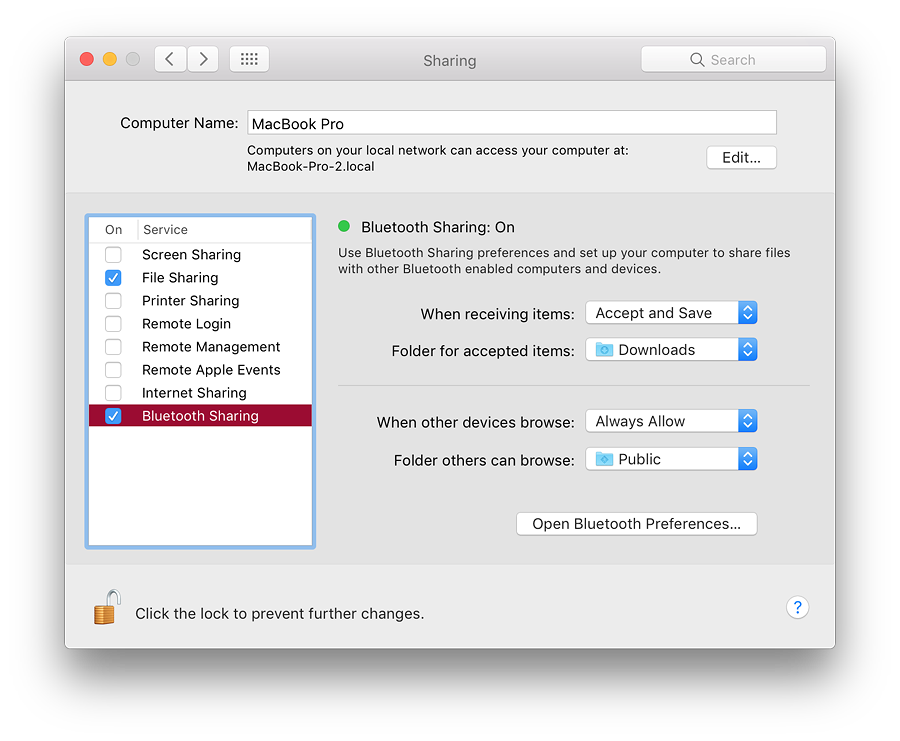
A button at the bottom of the panel allows a user to open the Bluetooth preferences panel.
See Also:
Graham K. Rogers teaches at the Faculty of Engineering, Mahidol University in Thailand. He wrote in the Bangkok Post, Database supplement on IT subjects. For the last seven years of Database he wrote a column on Apple and Macs. He is now continuing that in the Bangkok Post supplement, Life. He can be followed on Twitter (@extensions_th) |
|

For further information, e-mail to

|


 Sharing a screen requires the permission of the second user (or settings to be left open). The full desktop of the remote machine appears on the master computer and all operations can be run from there. A Screen Sharing icon also appears in the Dock and the connection can be quit using this.