System Preferences in OS X 10.9, Mavericks: Mission Control

AMITIAE - Tuesday 29 October 2013
|
System Preferences in OS X 10.9, Mavericks: Mission Control |
|
|
|
By Graham K. Rogers
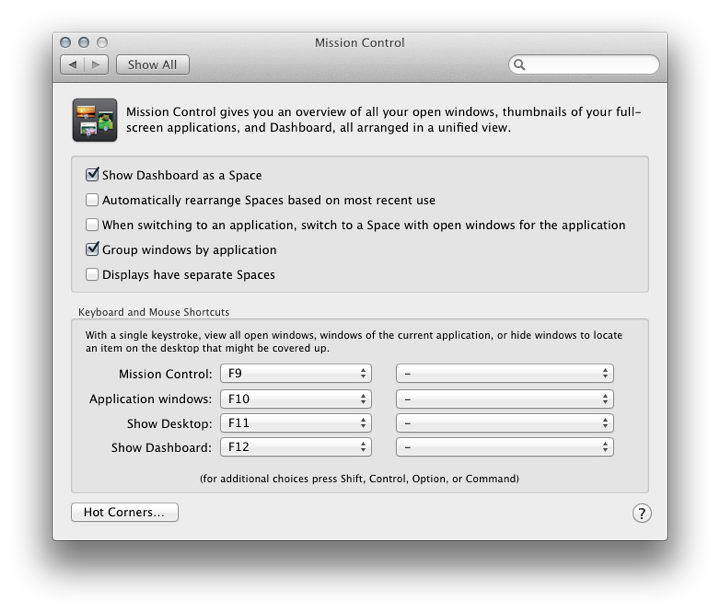
Mission ControlMission Control is activated by using its icon in the Dock, using gestures (see Trackpad Preferences), or via Key Commands. Apple has returned to using "Spaces" with the upper case "S" (Spaces). There are now five checkboxes for activating features with Mission Control (up from four in 10.8):
Keyboard and Mouse ShortcutsWithin the Mission Control Panel users may allocate specific keys for some of the operations which are similar to those that had been available in Exposé. Four operations are available, with eight buttons shown in two columns. The first is for key commands; the second for mouse controls:
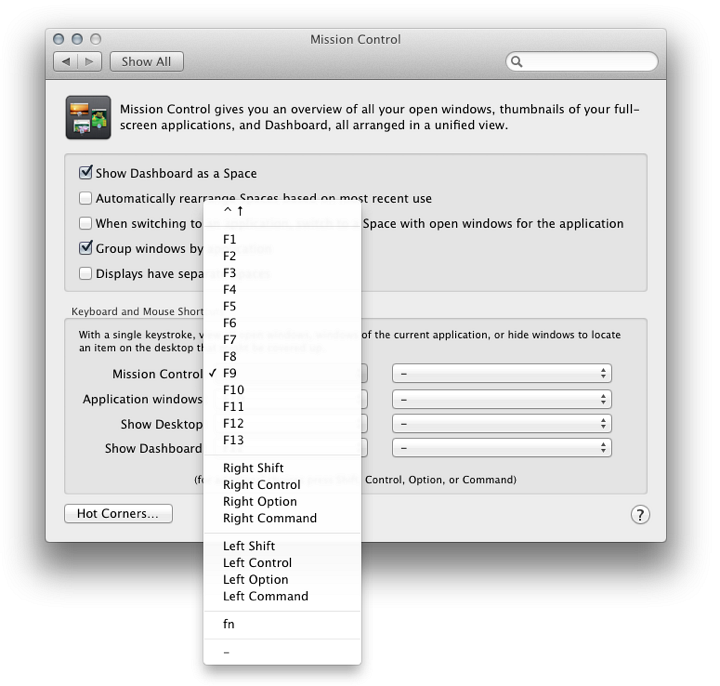
When clicked, each button in the first column reveals a list of keys which may be used to reallocate the command. For example, instead of the default F9 for Mission Control, we may choose Right Shift. When selecting a key, pressing on a modifier key (e.g. Control) adds that to the command. Re-allocation takes affect immediately.
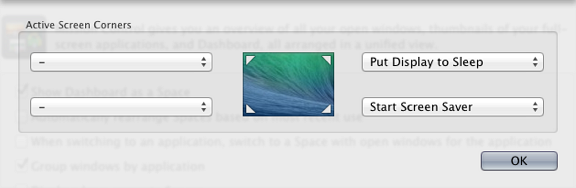
Hot CornersSpecific actions may be allocated to any of the four corners of the screen. As the cursor moves to the corner, an action is carried out. Options available are Mission Control, Application Windows, Desktop, Dashboard, Notification Center, Launchpad, Start Screensaver, Disable Screensaver, Put Display to Sleep and - (no action).
NotesMission Control manages Spaces. On new installations there is a single Space (plus Dashboard). On Macs that have used Spaces before, the same number is available with the update to OS X, 10.9, Mavericks. If Spaces has not been used before, a default single space is available.New Spaces can be added when Mission Control is being used - click the icon in the Dock - by moving the cursor towards the top right of the screen. A new, semi-transparent Space appears (using the desktop image from Space 1). By clicking in that new Space, it becomes active and is allocated a consecutive number (e.g. Desktop 7). This then also appears in Key Commands. To remove a Space, slide the cursor towards the Space display when Mission Control is being used. An X will appear at the top left of the Space thumbnail. Clicking on this removes the Space. When an application icon is shown in the Dock (open or not), click on the icon and use the Options menu to Assign the application to "All Desktops" (previously "All Spaces") or "This Desktop" or "None". The last is available when the application has already been assigned to a specific Space. As pointed out to me in an email from Greg of Imaja Software, when discussing an earlier version of OS X, another useful feature is that when Mission Control is used to view all open windows, the miniature views of the application panels can be enlarged by moving the cursor over the specific pane and pressing the space bar (as in Quick View).
See Also:
Graham K. Rogers teaches at the Faculty of Engineering, Mahidol University in Thailand where he is also Assistant Dean. He wrote in the Bangkok Post, Database supplement on IT subjects. For the last seven years of Database he wrote a column on Apple and Macs. |
|

For further information, e-mail to

|
