|
By Graham K. Rogers

There have been a number of changes to System Preferences in OS X 10.9, Mavericks. Some have been renamed; some adapted; some have changes in the way they work. Accessibility provides settings aimed at assisting the disabled. With the latest version of OS X, these settings have seen two additions. Some of the settings have seen other changes.
Previous versions of Accessibility were known as Universal Access. There were four categories of assistance. In the most recent version this has been reduced to three: Seeing, Hearing and Interacting. The functions are displayed in a window to the left. There are 9 items. In Seeing: Display, Zoom and VoiceOver. In Hearing: Audio and Captions (new). Interacting controls Keyboard, Mouse & Trackpad, Switch Control (new) and Speakable Items. Switch Control has a number of useful ways to control a computer from external devices, but may need some careful examination.
As each item in the left side window is highlighted, so controls are shown in the main panel. At the bottom of every pane is a singel checkbox: Show Accessibility status in menu bar. When the menu bar feature is on this is shown in the menu. As well as the icon, a scrolling text is shown for a short period when certain features (e.g Sticky Keys) are activated.
Seeing
The three items in this section are Display, Zoom and VoiceOver.
Display works as before (Mountain Lion). The settings here are intended for those with vision problems. There are two checkboxes: Invert colors and Use grayscale. The "Invert" feature was previously called, "White on Black".
It is also possible to invert the colors using the key combination of Control + Option + Command + 8. The same key combination turns it off.
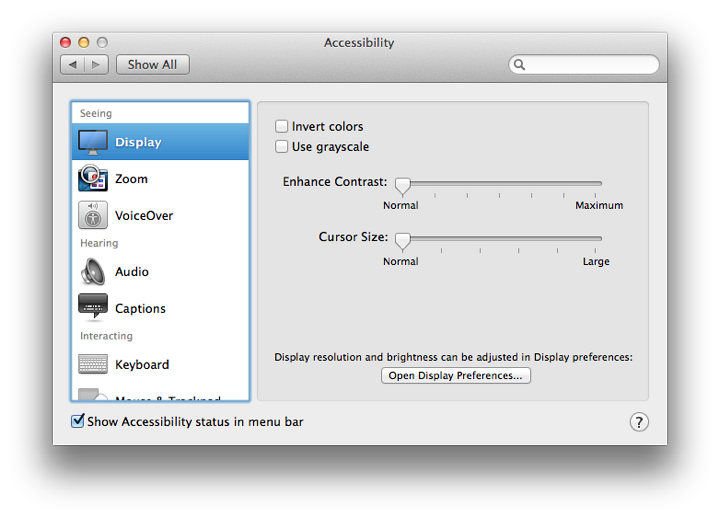
Below the checkboxes are two sliders: Enhance Contrast (Normal to Maximum); and Cursor Size (Normal to Large). The largest cursor is about 1" from end to end. Near the bottom of the panel is a button marked Open Display Preferences.
Zoom provides several ways to control the way zoom may be used. At the top is a checkbox (off by default on my computer) allowing a series of key commands to be used:
- Option + Command + 8 zooms in and out;
- Option + Command + = zooms in;
- Option + Command + - zooms out;
- Option + Command + \ toggles smooth images (when off, jagged edges appear).
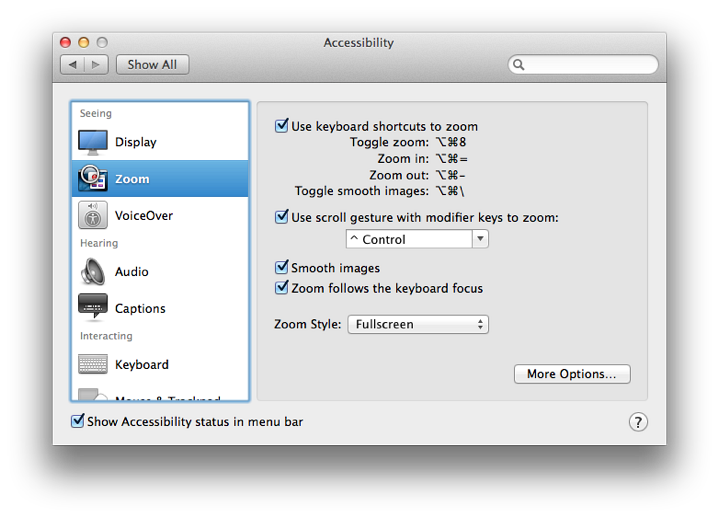
Below the key command options is a checkbox to allow the scroll gesture (2 fingers on a trackpad) to be used with a key to zoom in and out smoothly. Before Mountain Lion (OS X10.8), this had been in the Trackpad preferences. The default key that this works with is Control, but Option and Command are also available.
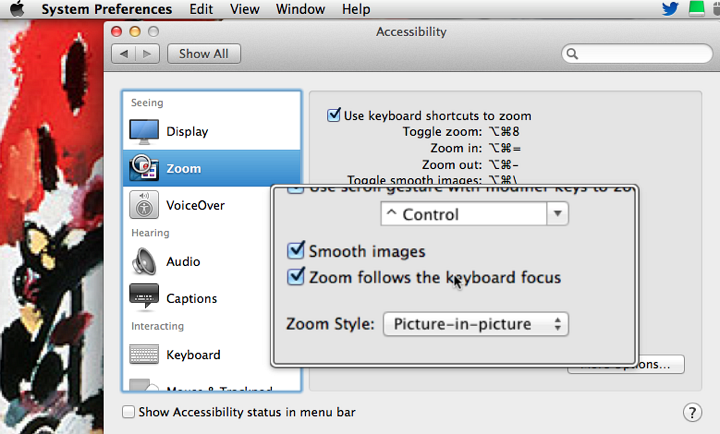
Two other checkboxes below are to turn on Smooth images (wise when zooming); and to Follow the keyboard focus. A button below these checkboxes allows options for the Zoom style. This is allows either a full screen zoom or "picture in picture" when a panel displays the section of screen zoomed, with the surrounding part not zoomed.
VoiceOver provides assistance for those who need assistance with sound commands. The panel has a text description of the purpose of VoiceOver: "Provides spoken and brailled (sic) descriptions of items on the screen and provides control the computer through the use if the keyboard."
There is a single checkbox: Enable VoiceOver. This may also be turned on using the Command + F5 keys. When either is used, a panel appears and a voice reads out information. A box on the panel allows access to a series of VoiceOver training screens, with a spoken commentary.
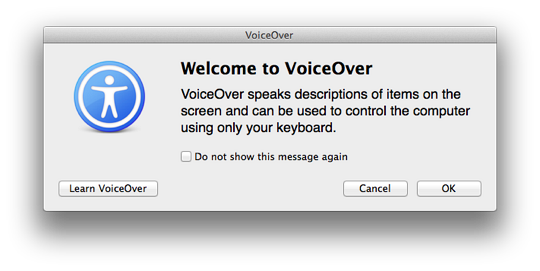
Near the bottom of the VoiceOver preference screen are two buttons: Open VoiceOver Training; and Open VoiceOver Utility. The training application reveals the same large screen seen with "Learn VoiceOver" in the panel (above). The system voice reads out the training pages and talks the user through the operations. The voice was a little fast for my liking (certainly too fast for a non-native speaker), so I adjusted the speed down from Normal in the Text to Speech panel of Dictation & Speech preferences. Even so, it might take a couple of runs through to grasp the full idea.
The other button opens the VoiceOver Utility panel (similar to System Preferences in appearance) with 10 separate functions, each with their own fine-tuning sections.
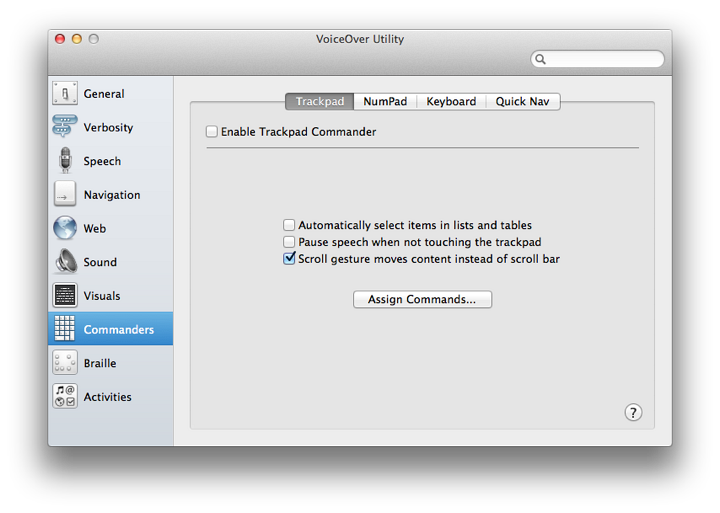
These allow VoiceOver to be set up for a user's specific needs and includes settings for any Braille display attached. The same 10 settings are available as before: General, Verbosity, Speech, Navigation, Web, Sound, Visuals, Commanders, Braille and Activities.
Hearing
This section includes one of the new features, Captions. There are two options aimed at those with hearing difficulties:
Audio has two basic features (as before): a checkbox for "Flash the screen when an alert appears"; and Play stereo audio as mono. Below the first of these is a button to allow a test of the feature. Another button at the bottom of the panel is marked Open Sound Preferences.
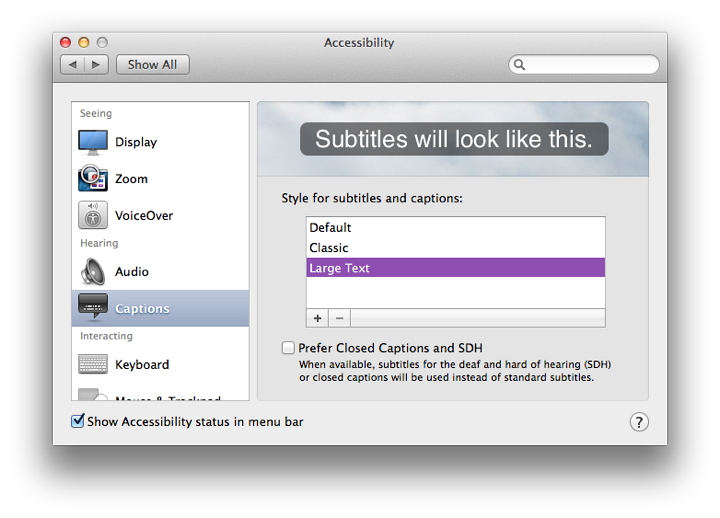
Captions is a new option that is intended for setting up Closed Captions and Subtitles when these are available. The panel is in two parts: a style panel and a checkbox below for turning on Closed Captioning and Subtitles for Deaf and Hard of Hearing (SDH) when available.
When the panel is opened there are three styles of subtitling: Default, Classic and Large Text. Highlighting one of these displays the style in a window above. There are animated clouds behind the text.
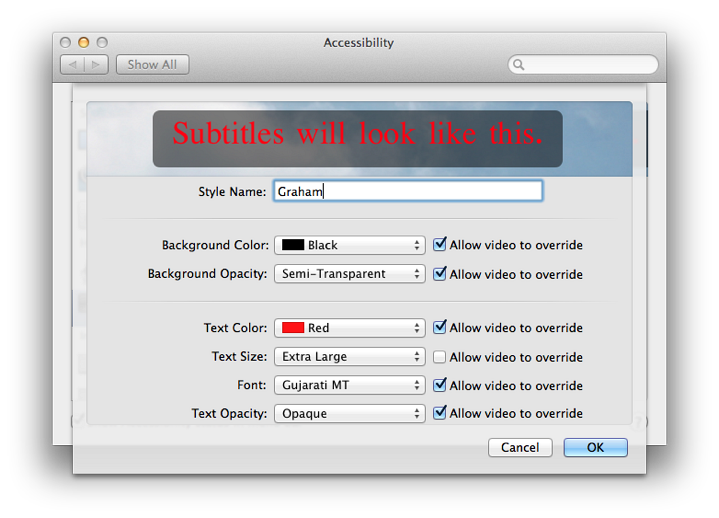
It is easy to add (or remove) a style by pressing a + (or -) below the list of styles. Adding a style opens a panel that displays 16 different settings for text fonts, colours and sizes.
Interacting
The section named, Interacting, was also in Mountain Lion when it included the options for Keyboard, Mouse & Trackpad and Speakable Items. The new control option, Switch Control, has now been added to the other items.
Keyboard appears unchanged. With this the keyboard may be adjusted so that those with certain difficulties can type with a little less difficulty. There are two checkboxes in this panel: Enable Sticky Keys; and Enable Slow Keys. If a person is restricted to using a computer with one finger only, even typing a capital letter is a problem. With "Sticky Keys" and "Slow Keys", the Keyboard panel provides some solutions to those with limb-movement problems.
With Sticky keys the last-selected modifier key -- those used in combinations, like Command or Control -- remains active. When turned on (or as a modifier key is pressed), the computer makes a sound. Another sound is made when the feature is turned off. Pressing the key a second time, highlights it (with an optional sound), and pressing a third time cancels the key.
 An options button allows some fine tuning: checking a box allows this feature to be active once the shift key is pressed five times. A checkbox below this marked "Beep when a modifier key is set" may be slightly misleading as the sound is more like a mechanical clunk. The placement of the icon that appears may be selected with options for top, bottom, left or right of the screen.
Slow Keys adds a delay for those who have difficulties with initial or repeated keystrokes. Rather than simply tapping a modifier key as in touch typing, the key remains active and a second Key (or more) may be pressed. As an example I pressed Command then Shift, and then 3 to take a screen shot using one finger only. There is a short mechanical sound when the key is pressed and another when it appears on the screen.
A Slow Keys Option button reveals a slider allowing the acceptance delay to be adjusted, so those with disabilities that make typing very slow can be accommodated. I found that moving the slider more than about 25% along produced a delay so significant I was not sure the keys were being recognised. This was the same in OS X 10.8, Mountain Lion.
To access more features, there is a button here that opens the Keyboard preferences.
Another part of this section works with Security & Privacy to allow certain apps to control the computer. Examples I have added are Automator, Little Snitch Agent, System Events and yType (using shortcuts to enter text strings).
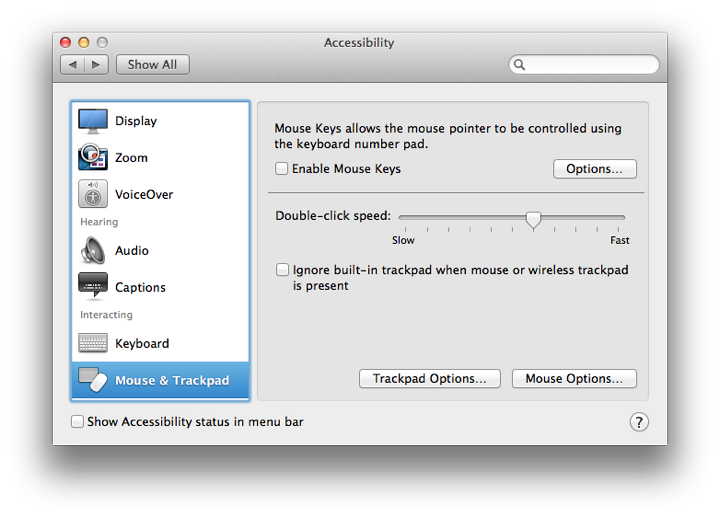
Mouse & Trackpad displays a panel that is in two parts, separated by a thin line. At the top is a checkbox for Mouse Keys. When this is active, the cursor can be controlled using the number pad on the keyboard.
On a notebook computer where there is no number pad, 7, 8 and 9 control upward (and diagonal) movement; U and O control left and right movement; J, K and L control downward (and diagonal down) movement. However, when these keys are used, the normal typing functions of the keyboard are not accessible.
As it is not convenient to keep turning this options on and off to resume typing, an option panel allows a checkbox to be used to toggle the feature On and Off by pressing the Option key five times.
A further useful checkbox here is the ability to Ignore the built-in trackpad when this feature is on. Two sliders control Initial Delay and Speed.
Switch Control is a new and highly tunable feature that allows connected devices to be set up with specific controls or options for use by physically challenged users. The panel explains that with this, the computer may be controlled by one or more switches, such as mouse, keyboard, gamepad buttons, or dedicated services. For the moment, there is limited information about this section, so users should treat this with care.
There are four sections to the panel: General, Switches, Navigation and Timing:
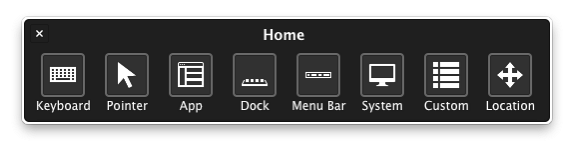
- General is a deceptively simple panel with one checkbox (Enable Switch Control) and a button marked Open Panel Editor. Checking the box opens a panel that has a number of controls available: Keyboard, Pointer, App, Dock, Menubar, System, Custom and Location.
It is not fully clear at this stage to me how these controls may be used, but pressing any one of them allows a user to change the behaviour of each of these input methods.
When the panel is active, pressing the space bar cycles through the 8 items (twice) and a voice announces each. If one of the items is clicked on - say the Dock - that function is active: the Dock appears. Pressing the space bar then announces each of the apps that have icons in the Dock. A small rectangular marker highlights the app announced. As the marker hovers over the icon, pressing the space bar activates that app.
The voice and the motion were too fast initially, but this can be adjusted in the Timing panel.
The button marked, Open Panel Editor, makes it possible for a developer to add functions to any of the devices or add new devices to accessibility control. Care needs to be taken when attempting to use such features.
- Switches are the commands that a user would be able to use. The default is a Space Input, which scans between the controls automatically when Switch Control is enabled (a checkbox allows autoscanning to be resumed). A user may reassign the switch or add others using controls beneath the panel.
- Navigation displays a series of buttons that allow fine-tuning of the way scanning operates apparently when navigating the screen: see comments below.
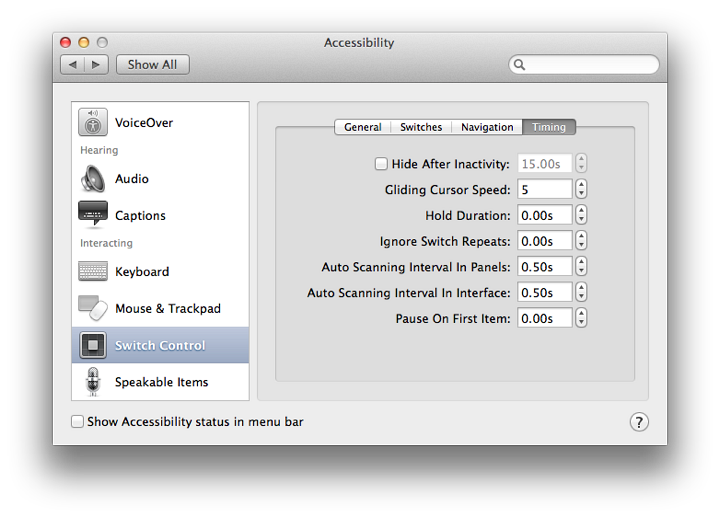
- Timing has a series of small panels in which a user may enter times that actions are limited to.
This control feature provides a number of ways in which devices can be tuned so that they provide better input for users. I expect that Apple will provide documentation in the near future that will allow users and developers to be able to make full use of these controls. This text will be updated when such documentation is available.
Speakable Items is designed to allow control of the computer using voice. Since this first appeared, I have had limited success with this. There are three panels here: Settings, Listening Key and Commands.
In Settings, two radio buttons are available, to turn the feature on and off. A button allows a specific microphone to be selected, with the default being the computer's internal microphone. A further option is Line In, but others appear if a microphone is attached, say via USB.
A Calibrate button opens a panel with a number of phrases that the user can repeat to assist with recognition, along with a slider to adjust input levels. Below this is a box that when checked gives a spoken command recognition and a button beneath allows selection of a system sound to add to confirmation (or None).
The panel for Listening Key allows the user to specify which key is pressed when speaking a command so that the computer listens. This is marked, "Change Key". The ESC key is the default on my Mac, but the user may change this to another key (or combination). Below are two radio buttons that control listening: only when the key (e.g. ESC) is pressed, or continuously.
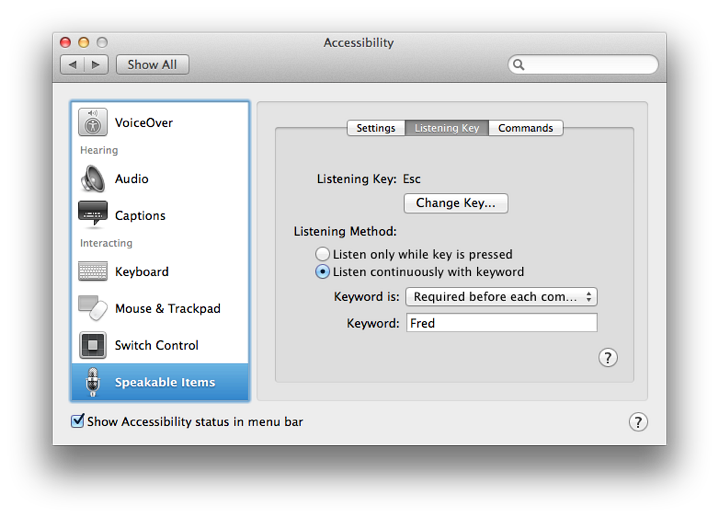
When Continuously is selected, a Keyword option is used: Optional, before each command; 15 seconds after; or 30 seconds after the last command. A panel below is for a user-specified keyword. I typed in "Fred" when I was using OS X 10.5, Leopard and that remains the keyword still. A user may use any word that may be convenient.
The Commands panel allows certain specified types of key commands to be used, such as for Contacts or for Application Switching. Some of these (such as names in the Address Book) are configurable using a button available on the panel. Two other buttons are available: Open Speakable Items Folder which shows the contents (and commands that can be used); and Helpful Tips, a panel with some suggestions on how the feature can be used.
Additional Information
As often happens, the morning after an update (or the morning after putting an item online), someone comes up with an idea that is totally relevant and not to be missed.
Writing on TUAW, Steven Sande has a tip for using Speakable Items with an Automator workflow, so that certain actions (e.g. launching apps) can be done with a voice command. This is a video tip and the Flash video (why Flash in a Mac-centric publication?) is embedded in the page.
Graham K. Rogers teaches at the Faculty of Engineering, Mahidol University in Thailand where he is also Assistant Dean. He wrote in the Bangkok Post, Database supplement on IT subjects. For the last seven years of Database he wrote a column on Apple and Macs.
|