eXtensions
|
Getting smart with Panther |
I installed 10.3 over a month ago and have begun to get to grips with most of the changes from 10.2.x (Jaguar). Some I like; but not all. One improvement with 10.2.3 was better memory management. I had been running close to the limits but now have a reasonable amount spare in normal operating conditions.
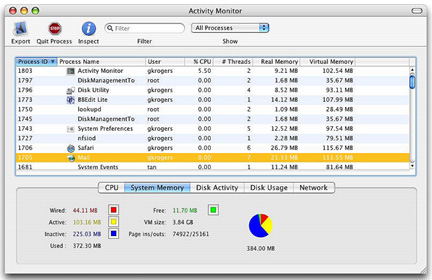
To see how memory is being used, open Activity Monitor. The top panel shows details of applications open (and you will be surprised at what is there). At the bottom are five tabs to show details of CPU, System Memory, Disk Activity, Disk Usage and Network.
The most visible change in Panther is to the Finder. I think of this as something halfway between an application and part of the operating system: a user interface with teeth. Instead of Aqua, we now have a metallic finish. Some like this; some do not. There have been two major additions to the Finder: a sidebar; and differences in the toolbar above the window.
The sidebar makes navigation to folders, applications and files quicker. There is a default selection of aliases in the sidebar, including, the hard disk, a Network icon, the user's home directory, and Applications.
You can add almost anything to this list; so if you have a particular folder that you need to access regularly, drag it across (or press Command + T) and an alias is created. The icons increase their size as the window is enlarged. When removable media (such as a flash drive) are used, these appear in the sidebar as well as on the Desktop. In the sidebar there is a small "Eject" icon adjacent (you can add one to the toolbar as well), so removing such media does not need the drag to the Eject icon in the Dock.
It is also possible to add applications to the sidebar. I did some experimenting and found that I could also add an alias to the desktop printer, although that is a bit redundant as I already have one in the Finder toolbar.
What I could not slide across (or put in the toolbar) was an alias of the Trash, so that stays in its corner in the Dock. This is not always convenient, so I was pleased to see that in the new Actions menu in the toolbar, is "Move to Trash." Click on one item (or several) and select this easy method.
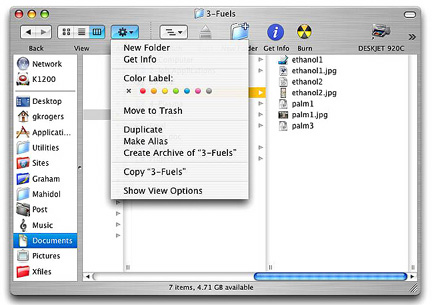
The toolbar "Action" menu has a number of new uses, and the return of a favourite that was lost when OSX took over from OS9: coloured labels. These are certainly brighter than before: if you are not careful the effect can be overdone. To add a label, select an item, and click on the required color, either in the Action menu or in the Finder's "File" menu.
As well as commands that are also in the File menu, there is one to create an archive: selected items are zipped. The file created is slightly larger than an archive created by Stuffit (the standard application) but access through this menu is far quicker than starting an application. Files created in this way can be opened on other platforms without problem.
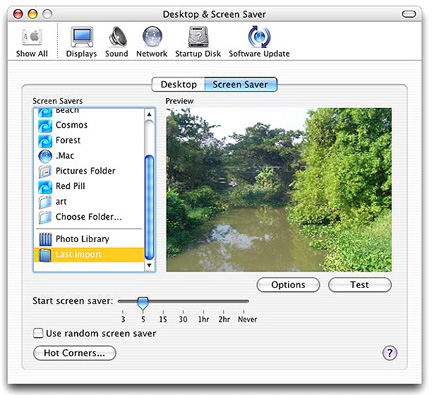
One of the things I was not totally happy about was the screensaver. This has become a lot more flexible in terms of what you can choose to have displayed on the screen, as the iPhoto library is one of the selectable items, along with the "last import", so take a few shots with a digital camera and you have an instant screensaver change.
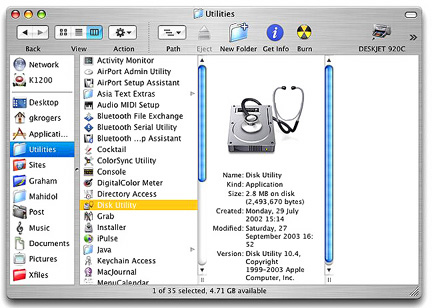
By default, journalling, which was only available on OSX Server (unless you had a 3rd party utility like Cocktail), is now turned on. A record is kept of changes to the OS and should there be -- rare event that it is -- a crash, or some-such disaster, the system will remember where it was and what it was doing. There is a very slight overhead in terms of speed. Some users consider this feature unnecessary. If you should want to turn journalling off, you need to start the Disk Utility, select the relevant partition and choose "Disable journalling" in the File menu (Command + J). Fool that I am, I trust Apple and leave this turned on.
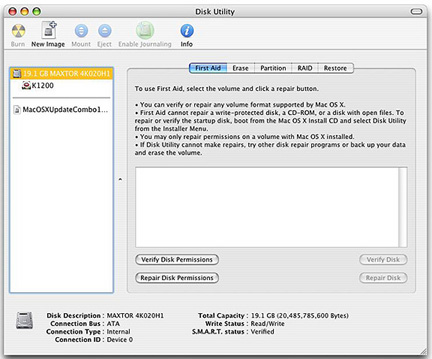
In the last column, (21 January 2004) I referred to the S.M.A.R.T. status of the disk: something new that allegedly lets you know if the disk is about to fail: a feature of the Disk Utility. Click on the disk icon (not the partition icon below) to see this. I could not discover what the acronym stood for until after I sent in the column: Self-Monitoring, Analysis and Reporting Technology. IBM and Apple hand in hand again.
As much as I love the ability to switch users, even if I do not get to see the rotating cube on the iMac, I am annoyed if another user leaves iTunes running. This means that no one else can use it. As Administrator I have a remedy. Open Activity Monitor (in Utilities) and select either "All Processes" or "Other User Processes". Highlight the nuisance application and press the big, red Quit icon in the toolbar. You need an Administrator's password.

For further information, e-mail to Graham K. Rogers.
To
eXtensions: year One