|
By Graham K. Rogers

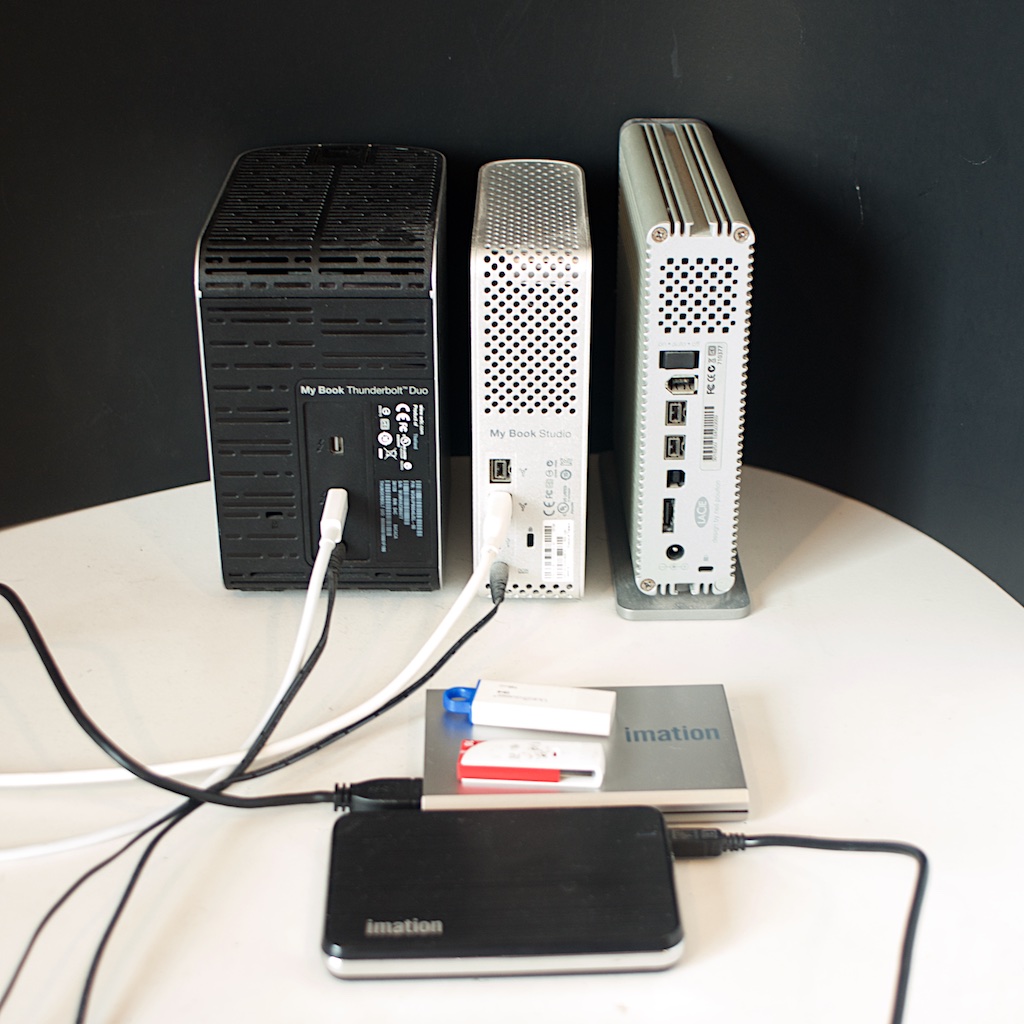
Having bought the new iPhone 6 and iPad Air 2 from the Apple Online Store, the points on my credit card had reached a sensible level and it was time to redeem some. Although I check the listings for something (anything), I find that the best choice for me is another backup disk. In this way, I had already acquired a couple of Imation disks which are working quite well, so ordered another.
I already have a number of backup disks, and I spread data over these as well as backing up with Time Machine on three of the disks: two at home and the Imation USB 3 disk at the office. I ask colleagues and my students about backing up. Despite thefts or hard disk failures, think it will never happen to them. It does. It will.
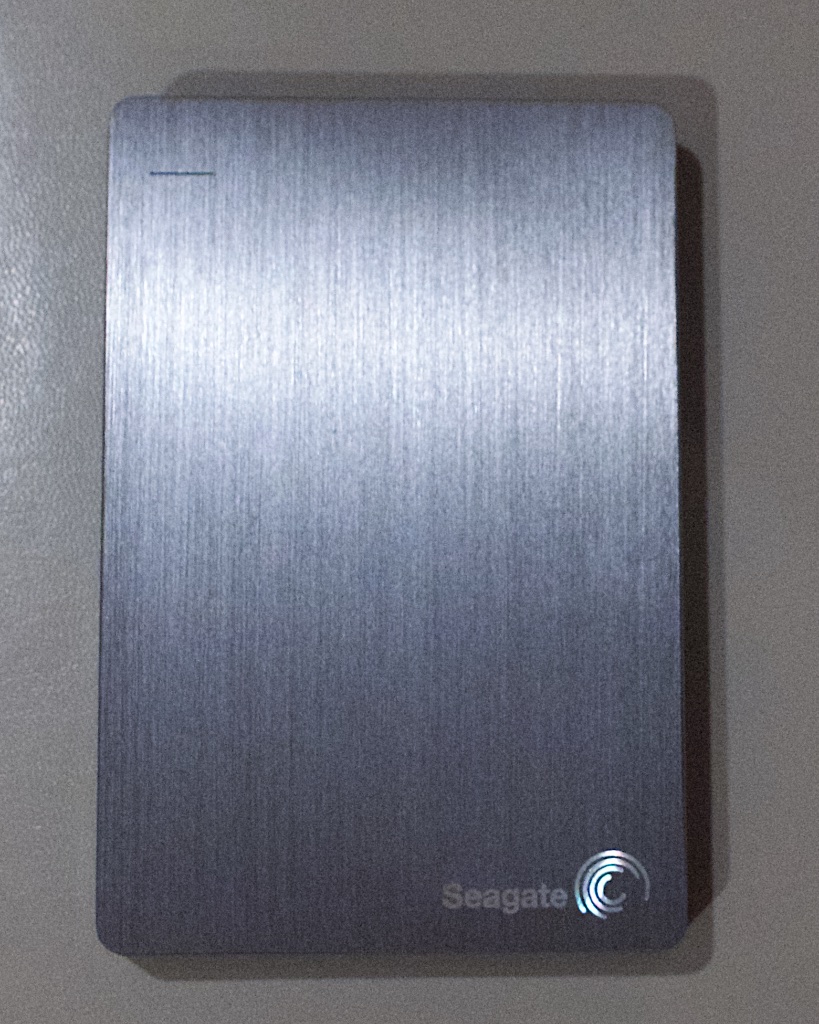
At the end of last week, there was an apologetic phone call from the credit card company: they had changed the specifications; instead of Imation, they were offering a 1TB Seagate disk (USB 3) with a 3 year warranty. It arrived today.
I already have Mavericks installed on a 16 GB flash drive (that was Imation too) and a 500 GB USB 2 disk, but these are both slow. That flash drive installation has been a boon - despite its slowness - and with Disk Warrior that I have on it, I have been able to make a number of fixes while away from home. I keep it in the backpack.
With the arrival of Yosemite, it is time to update and I had a search for the instructions, coming up with three useful articles:
- How to make a bootable OS X 10.10 Yosemite install drive -
Dan Frakes, MacWorld
- How to Install OS X 10.10 Yosemite on an External Drive - Johnny Winter, Tuts+
- How to Install OS X Yosemite on Any External Drive (Thumb Drive, USB Disk, etc) - Paul Horowitz, OS X Daily
As I was familiar with the Dan Frakes article from last year on installing Mavericks and the wording was similar, I based my installation on his current article, with a couple of changes. He offers three methods, but as I am quite happy with work in Terminal and already had the Yosemite installer hidden away in a folder on my desktop, I chose his "Option 1: Use createinstallmedia."
An immediate problem with this method for me, is that the command used begins with sudo - substitute user "do" - and that only works in the Admin account. As all my work is in an account with User privileges only, I would have to switch operations to Admin: for a short while at least.

Before I did, I moved the Yosemite installer back into the Applications folder and copied the commands I would use into a text file. I saved that in the Drop Box in the Admin user Public folder. I could retrieve that when I logged in there. That command is
sudo /Applications/Install\ OS\ X\ Yosemite.app/Contents/Resources/createinstallmedia --volume /Volumes/Untitled --applicationpath /Applications/Install\ OS\ X\ Yosemite.app --nointeraction
. . . and it is all one line.
I did attach the Seagate drive to make sure it was working and had a look at the files that came with it. Well, I would not be using these again.
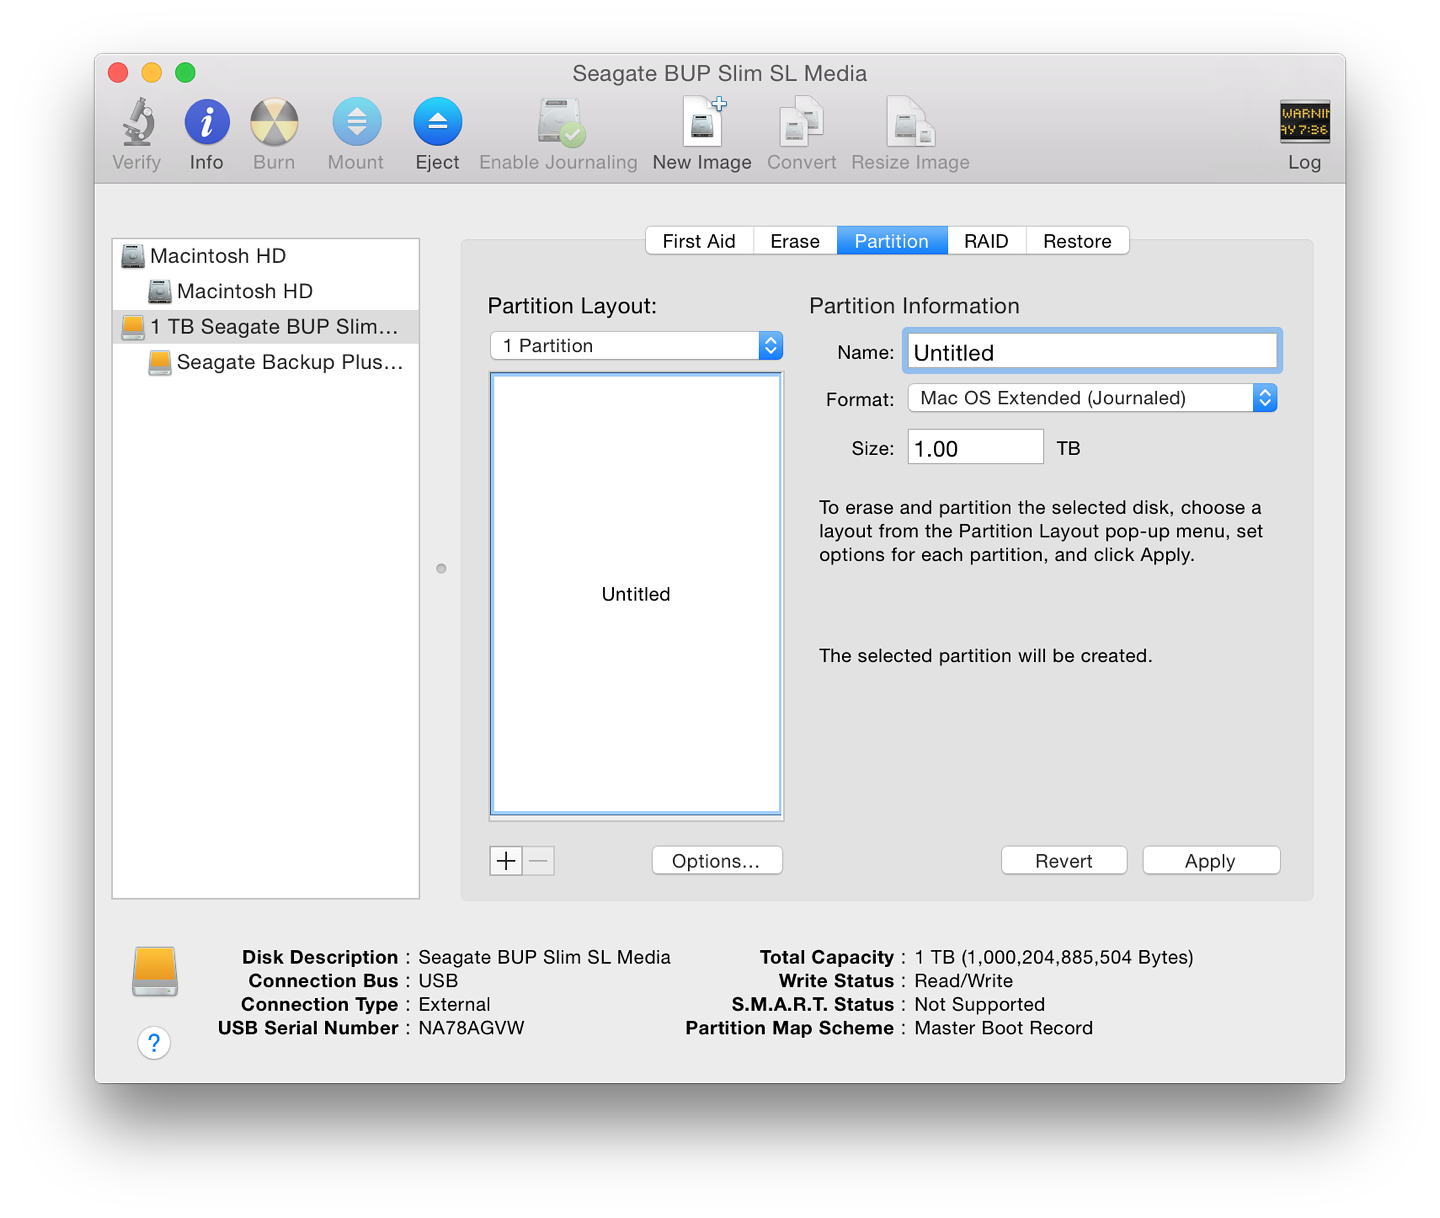
Using Disk Utility, I highlighted the disk, and accessed the Partition tab. Selecting 1 partition in the pull-down menu, I made sure the disk was named "Untitled" and selected the Format as Mac OS X Extended (Journaled). In the options, I clicked the radio button for GUID Partition Table. When I pressed Apply, it took about 10 seconds to give me my newly-partitioned disk.
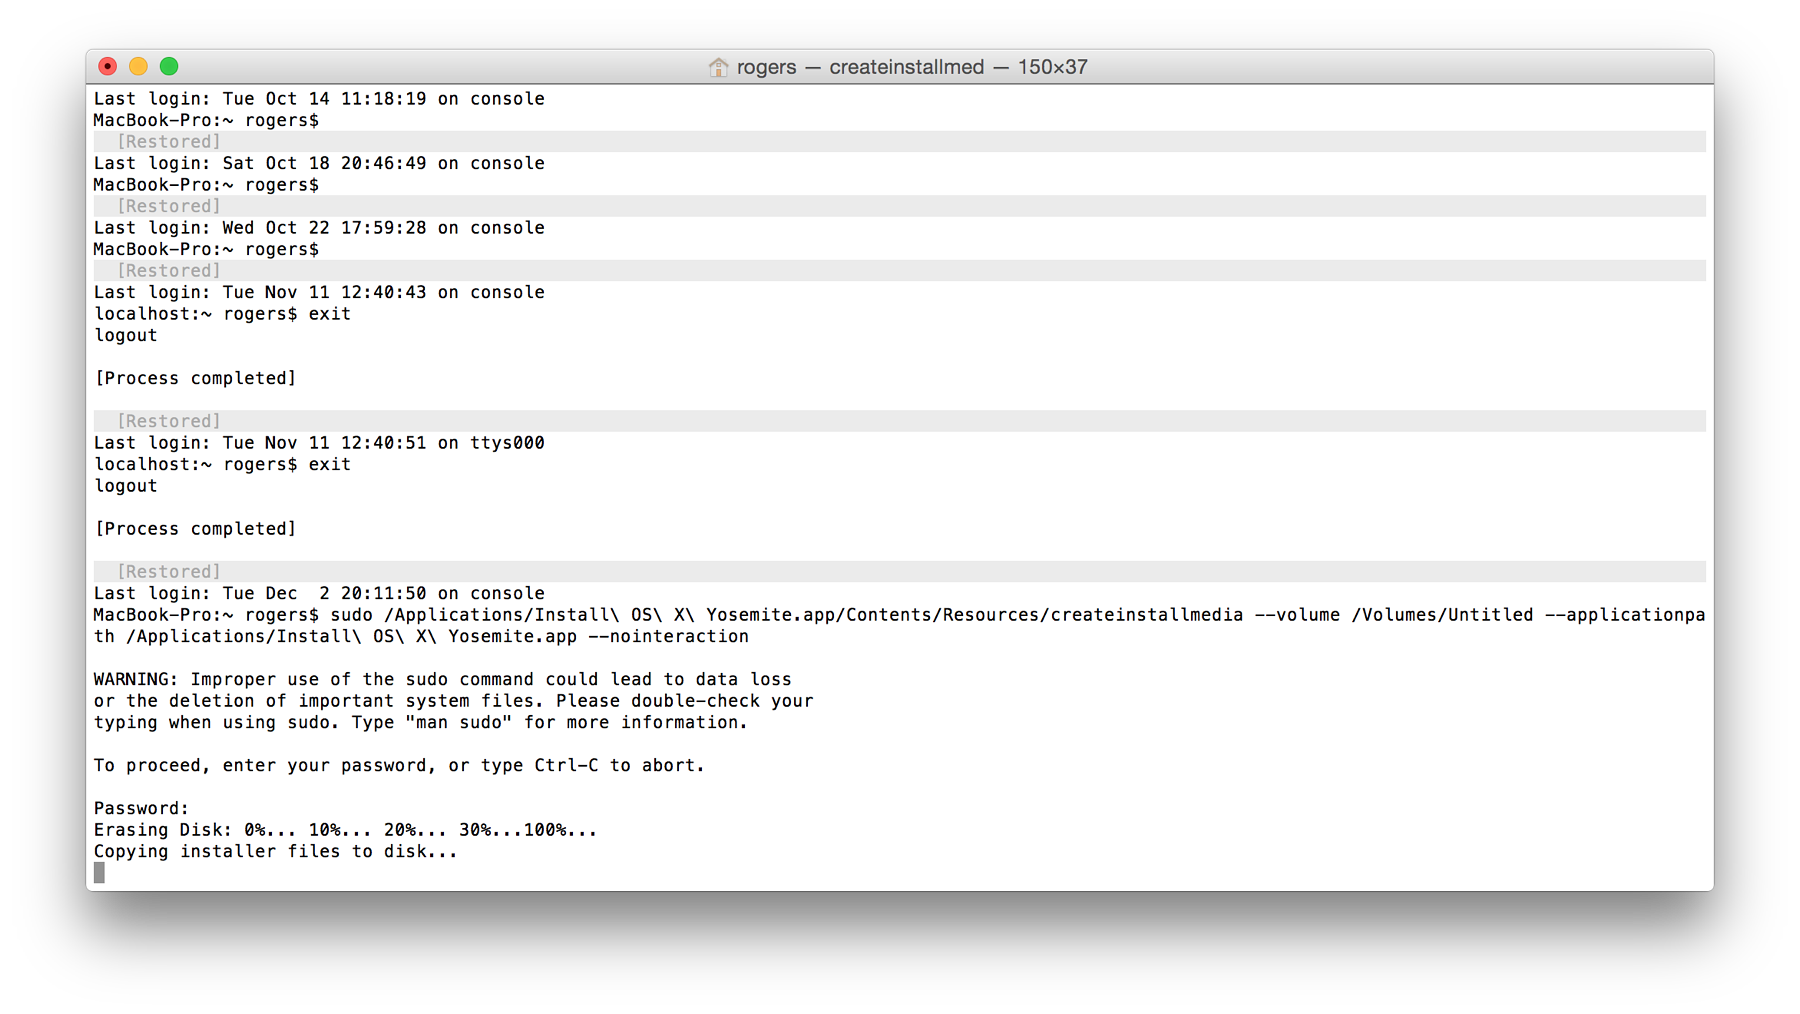
The rest was comparatively easy, partly because of my preparations. I restarted the Mac, reconnected the hard disk and opened Terminal. I copied the long command from the text file, entered the Admin password when prompted and let it do its work.

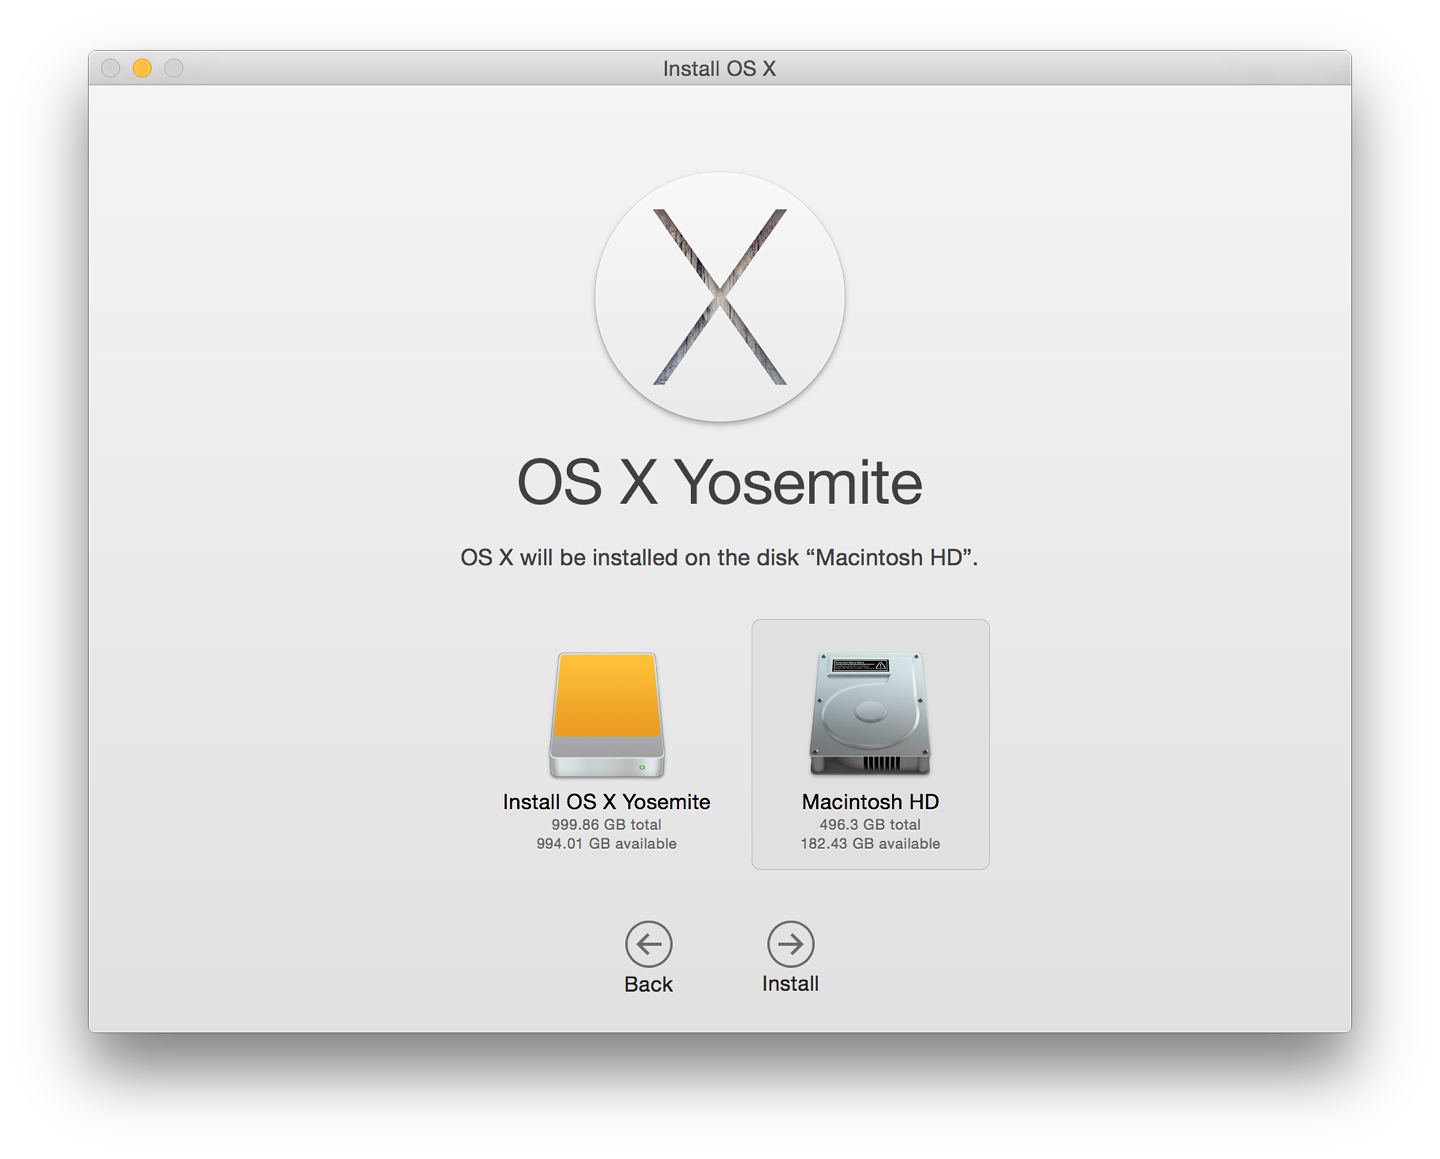
When it was done (it took about a minute), the Yosemite installer was available on the Seagate disk. I clicked on that and the OS X installation began. As part of the process, the installer shows the main disk only, but below is a button, marked "Show All Disks."I was then able to select the new disk and continue (after a warning about connecting a power supply).
When OS X first arrived, I used to watch any installation like a hawk; but in the last couple of years I have considerably more confidence, letting the software just get on with things. I typed up notes for this installation on my iPad using WriteRoom: this synchronises via DropBox and I can just copy and paste the text into the HTML file when I am done.
After the (second) restart, the white progress bar moved slowly across the screen, but eventually reached the end: this has to be slower than the in-built SSD of the Mac. I then had the setup to go through.
With any new installation this begins with the country, then the language. I was also asked to select a Wi-Fi connection and enter the password. I was ready with this: I keep it on a peice of paper which is locked away. I skipped setting up iCloud. If needed I would be able to access that later; but I did enter my Apple ID for iTunes (and software). This is different from my iCloud details. I was asked to verify my ID using a code sent to my phone via SMS.
The Admin account was setup up on the hard disk and I copied Disk Warrior over to the Applications folder. I also checked for updates: I had installed the 10.0 version of Yosemite and I knew 10.1 was available. Once that was complete, I used Startup Disk in System Preferences to highlight the main disk and restarted the computer.
Back to work.
Graham K. Rogers teaches at the Faculty of Engineering, Mahidol University in Thailand where he is also Assistant Dean. He wrote in the Bangkok Post, Database supplement on IT subjects. For the last seven years of Database he wrote a column on Apple and Macs. He is now continuing that in the Bangkok Post supplement, Life.
|