AMITIAE - Wednesday 11 December 2013


Focus 2: An Easy to Use and Inexpensive Solution for Image Blur and Tilt-shift Effects on the Mac


apple and chopsticks


advertisement


By Graham K. Rogers


Focus


Many who use social media sites are aware of the different effects that users like to apply to their photographs. As well as Instagram and other like sites, there are multiple apps that can be downloaded for free or at low cost, that make it quick and easy to apply the effects that only a few years ago would have taken much skill with photographic software to obtain.


I am a big fan of taking photographs with the iPhone and have a quite large collection of apps. However, my main cameras are still DSLR. I do most of the adjustments to images initially in Aperture and with some of the other applications installed on the Mac. Top of the list for me is Graphic Converter, although there are a number of other useful applications that I use regularly.

These include,

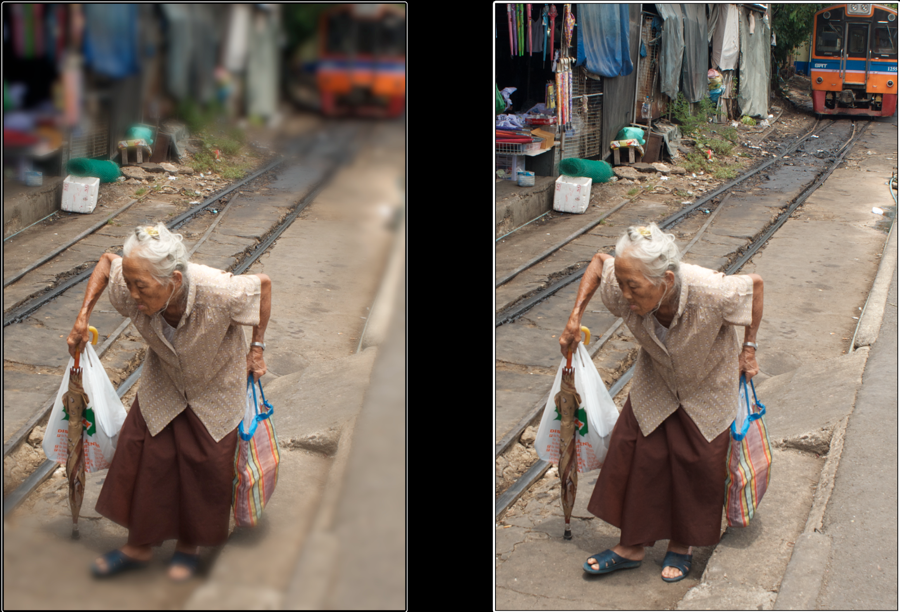
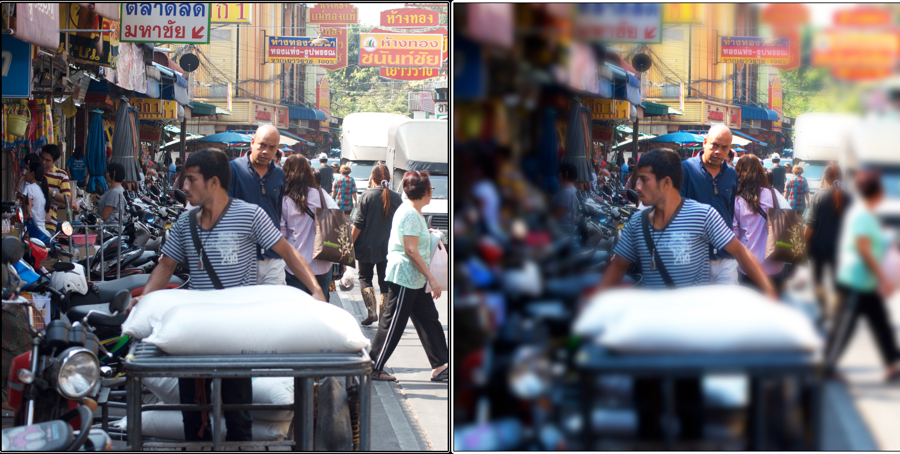
Each of these has a limited set of features, but do the tasks well. ColorStrokes, which adds colour to monochrome images (like iSplash) was developed by MacPhun who also put out a number of other apps, including Art Camera for iOS devices.

Last week, MacPhun released a new version of an application for Tilt-shift effects in images on the Mac: Focus 2. This application was initially created by Coppertino, but MacPhun has taken over all development and Focus 2 is currently at version 1.0.

The best way to create tilt-shift effects with a camera is to buy a lens made specifically for the task, such as the products of LensBaby. Such lenses are not cheap and the value for non-professionals is limited.

There are a number of apps for the task, and it is possible to create similar effects - blurring of parts of an image so the subject has an increased importance - using photo-editing software. This is a lengthy task, however. Far better, for some, to have an application that does the job quickly and easily.


Focus 2


Focus 2 is a fairly light application of 8 MB as installed on my MacBook Pro. When opened, a simple panel appears on which a user may drop a photograph. The first time the application is used, there are a number of hints concerning steps to take. A user may use the panel or the File menu and Open to import an image. This also opens the panel.


Focus 2


At the bottom of that panel are five options for output (plus Custom): Portrait, Nature, Architecture, Macro and Tilt-shift. To the left is an icon that allows the image to be cropped. To the right is an Export icon.


Portrait and Macro options have concentric circles as a control mechanism. The centre section is sharply focussed, there is some blurring in the outer circle and the rest of the photograph is more blurred. As with any good application, the output may be adjusted.

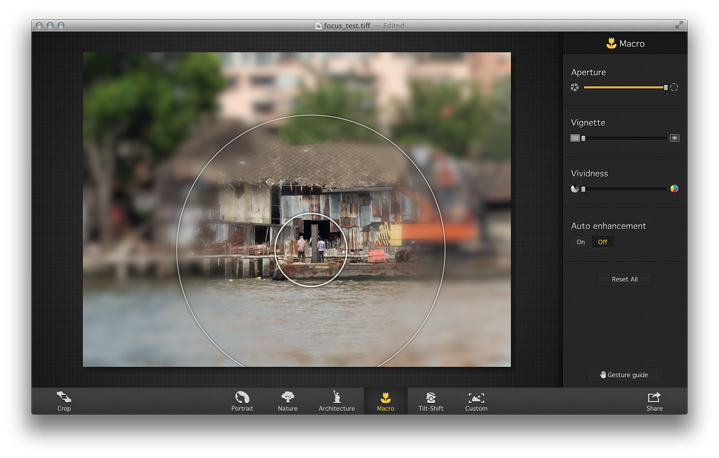
The circles, for example may be enlarged or made smaller. The amounts by which effects are applied are also adjusted using sliders in an editing panel to the right: Aperture, Vignette, Vividness. The editing panel also has auto-enhancement (On/Off) and a button to "Reset all".


Focus 2


Nature, Architecture and Tilt-Shift options display parallel lines instead of circles. For Nature these are placed horizontally; for Architecture, they are vertical; for Tilt-Shift the lines are diagonal. In each case a movable button in the centre of the screen allows the lines to be rotated. These three options also have the sliders at the side of the screen to adjust the level of effect applied.


The Custom panel takes a different approach, by opening the image in a blurred state and using an adjustable brush to apply focus to areas of the image. The size and hardness of the brush are controlled using sliders. This also has the sliders at the side of the screen to adjust the level of effect applied: Aperture, Vignette and Vividness.


Focus 2


I tried a number of images that I exported from Aperture in TIFF format. Each loaded instantly in the panel and adjustments were applied on the fly. When finished, I used the Share button to export the images. My preference was directly to Aperture, but there were also options for iPhoto, Mail, Facebook, Twitter and flickr.

The export to Aperture was the same resolution, although image size was considerably reduced from the RAW original. One example was from 18.99 MB to 1.43 MB. The File menu gave a number of other options. Three MacPhun applications that I do not have were shown in the menu along with Aperture and iPhoto, but there were also greyed out options for Adobe software (Photoshop, Photoshop Elements and Lightroom). Other export options included JPEG, PNG and TIFF as well as a Focus Document format.


Focus 2


I found that when using the different options for blurring the images, there was not one size fits all, so I initially tried all of the options to produce the best effect, including Custom.

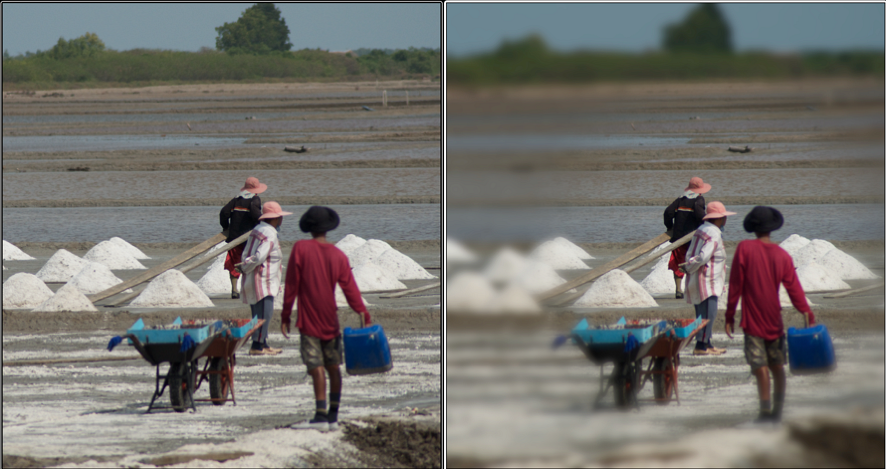
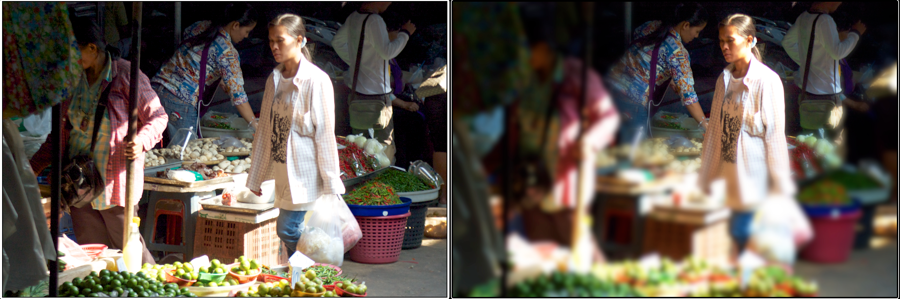
I also found that when using the sliders, as with effects in Apple's Aperture, "Less is more" was a good rule to bear in mind. I found myself applying a slider effect in Focus 2 and being dissatisfied with the contouring between focus and blur. Removing 50% of that softened the two areas and improved the output.


Focus 2 is a useful application that allows a fairly quick way to apply blurring to images that are on the desktop of a Mac. If, like me, the photographs are already in a workflow application like Aperture or Lightroom, or in iPhoto, the user would need to go through a pre-selection and export process to make the image available for use in Focus 2.

For many users that would only take a few seconds, and an experienced user would already be thinking about editing possibilities while examining the images in the workflow process.

This is not an expensive application at $9.99 from the Mac App Store (approximately 320 baht in real money) and goes into my collection of productivity applications, allowing me to produce interesting output without the overhead of expensive software; and in a relatively short time.


Focus 2


Graham K. Rogers teaches at the Faculty of Engineering, Mahidol University in Thailand where he is also Assistant Dean. He wrote in the Bangkok Post, Database supplement on IT subjects. For the last seven years of Database he wrote a column on Apple and Macs.


advertisement


Google


Made on Mac

For further information, e-mail to

information Tag information Tag

Back to eXtensions
Back to Home Page