Stickr from Bucket Labs: Beautifully Designed App for Adding Colored Labels to Images
AMITIAE - Sunday 6 January 2013
|
Stickr from Bucket Labs: Beautifully Designed App for Adding Colored Labels to Images |
|
|
|
By Graham K. Rogers
BackgroundA photograph on its own can be a piece of Art, if we are lucky enough to have the skills to produce such high quality output. As well as web work I like to output some of my better shots from my digital SLR camera in poster format and use the application Posterino for this. On the iPhone, I have been using Phoster for similar output. This has the advantage that it is working directly with the iPhone camera or the Photo library, which cuts down a lot of the processing time. I reviewed this app first in May 2011 and updated the article for eXtensions on 20 December 2011.I also had a look at Grid Lens, another app from Bucket Labs at the same time and was again suitably impressed by the app. These were both interesting concepts, well-executed and fairly easy to use. So when Bucket Labs produces a third imaging App, Stickr, the moment I saw it, I clicked on the Buy button. It was $1.99.
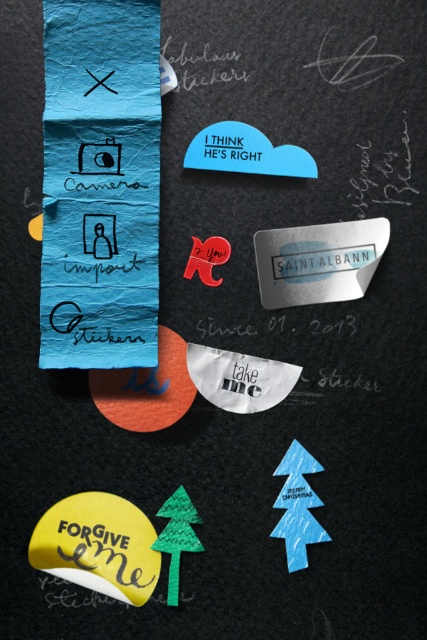
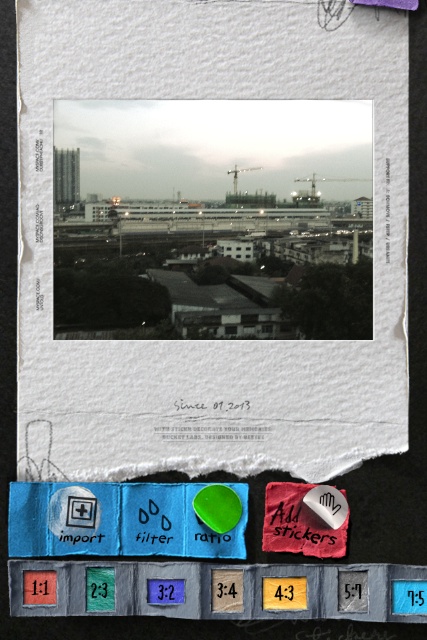
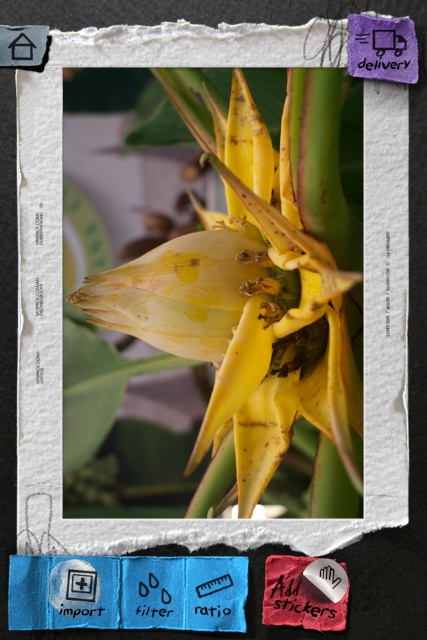
StickrWhen the app first opened, I thought it was stuck and was ready to try again, but down the bottom of the screen is a small icon that showed me data was being downloaded. I waited for a couple of minutes and then began.The interface is really nicely put together. All the menus and buttons are in the style of paper labels in bright colours. On the iPhone these appear a little small. To start a new project the curled blue paper to the top left is used. When tapped this shows camera, import or sticker. Bringing in an image from the camera or library is similar to other apps. Once displayed on the working panel - like a grey paper screen - there is access to a number of other controls in blue at the bottom of the screen: import (camera and library, which seems unnecessary; filter; and ratio. There is also a red button marked All Stickers. At top right is "Delivery" for export methods.
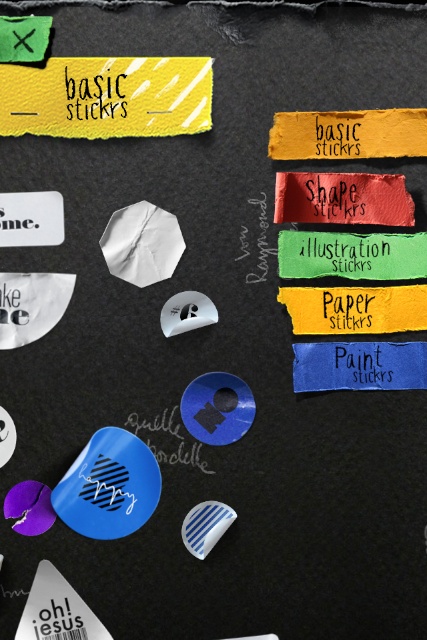
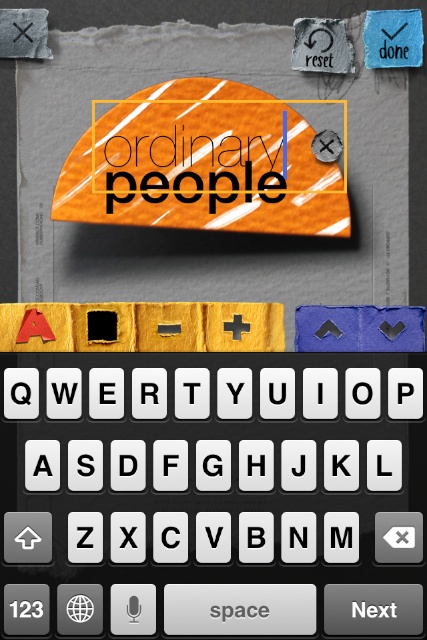
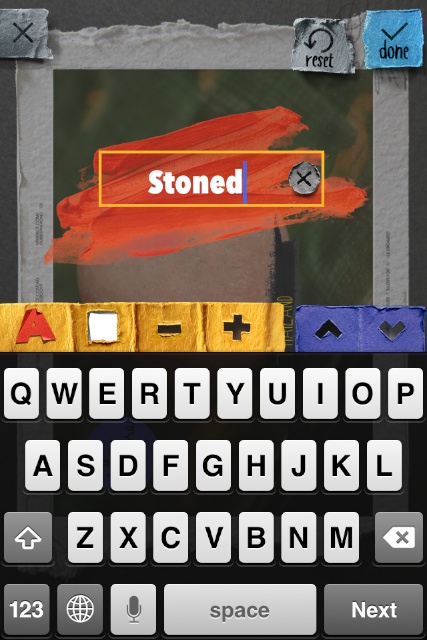
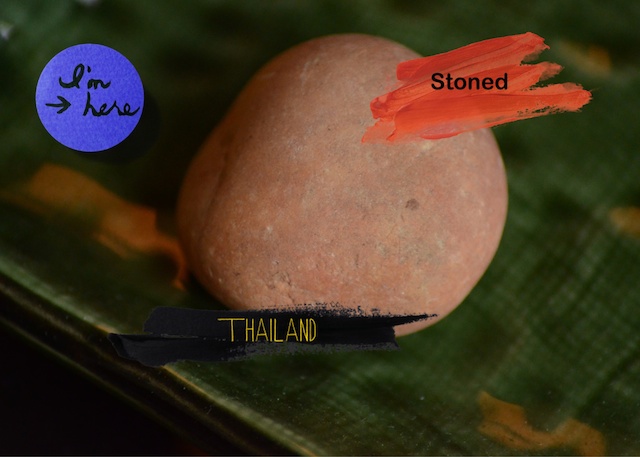
There are five sets of stickers to choose from: Basic, Shape, Illustration, Paper and Pain stickers. A sticker is displayed on the image and can be resized and moved using the fingers. Two controls appear for most stickers: a 90 degree icon (the sticker can be turned 90, 180, 270 and 360 degrees) and Trash. If the sticker doesn't look right, it is easy to dump it and try again. When some of the stickers are selected, text controls also appear. These are a font selector (10 fonts), font colour, font size adjustment, and selectors to position the text on the sticker. When the user presses Done, the sticker is placed on the image. Tapping the sticker, brings up the angle and trash icons along with a Text control. Pressing this, reveals the full complement of text tools.
Exporting and CommentsWhen complete, the Delivery tool reveals a list with export facilities for Twitter, Facebook, Instagram and a Save command. Images are then in the Photo Library. Back on the Home screen of the app, completed examples are shown towards the bottom. These may be accessed and worked on again; or by holding a finger on the image a red cross appears and the image may be deleted.
The app installed on the iPad, but was not optimized, so displays in the x1 and x2 panels. It was easy to work with in the larger display and output was acceptable. A test image I produced with a 1 x 1 ratio was shown as 2580 x 2580 (6.7 MP) with a size of 1067 KB. The original image had been taken with my Nikon DSLR so the input file was larger.
Graham K. Rogers teaches at the Faculty of Engineering, Mahidol University in Thailand. He wrote in the Bangkok Post, Database supplement on IT subjects. For the last seven years of Database he wrote a column on Apple and Macs. |
|

For further information, e-mail to
|
|