Document Scanning Apps for the iPhone: My Scans and Genius Scan
AMITIAE - Saturday 29 September 2012
|
Document Scanning Apps for the iPhone: My Scans and Genius Scan |
|
|
|
By Graham K. Rogers
As an example of this usefulness, while preparing for my annual visa extension, the secretary needed a copy of a document. A PDF was on its way to her by email within a minute. My original review of Genius Scan is at the end of this page
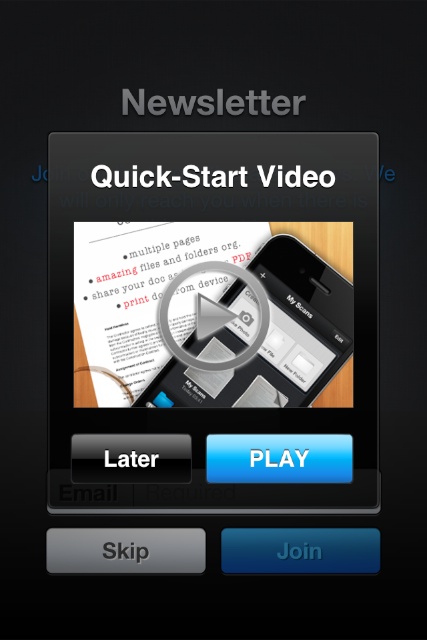
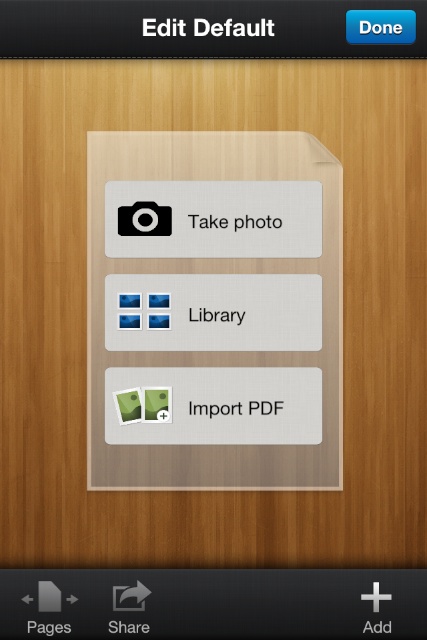
My ScansWhile Genius Scan has served me well over the last year or more, I was interested to see the arrival of My Scans in the App Store here. This is a free app with some limitations, allowing a user to try it out. In the free state, exported files are watermarked and there are other restrictions. If it seems satisfactory, the user may have the watermarking removed and add OCR (Optical Character Recognition) with an in-app purchase ($0.99). I tried this first in its free state.The new user is first offered to link to email information (which I declined) and also to view a video. This explains fairly clearly how to use the app, although like many such demos, the voice was a little fast.
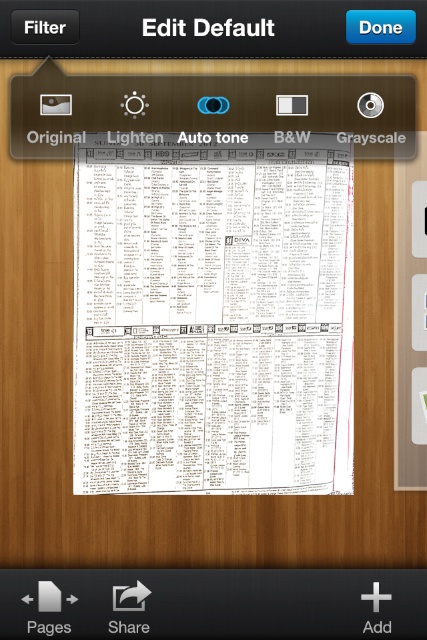
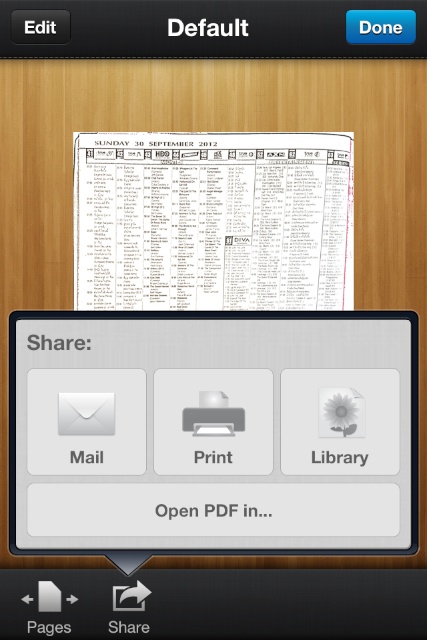
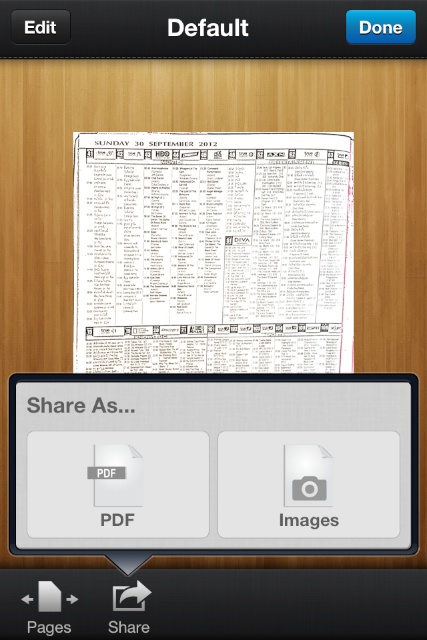
Automatically a selection of filters was made available over an "auto tone" version of the captured image: Original, Lighten, Auto tone, B & W and Grayscale. Double-tapping on the image makes more features available: Adjust (brightness/contrast), Filter, Crop and Delete. At the bottom of the screen in Page view are Pages which shows other items in the same folder and Share, which reveals an Export panel with options for Mail, Print and Library. Mail allows export in either PDF or JPG formats. The JOG has options for Small, Medium or Large. Genius Scan also allows this option for PDF output.
In App PurchasesBoth of the apps that I have that handle scanned images in this way have in-app purchases. With My Scans the basic (and for some essential) reason for making this purchase is to remove the watermark that appears on all PDF and image files exported.I also made the leap to the Genius Scan + (the Pro version) as the number of features especially cloud syncing (Dropbox and others) makes this useful and (hell, why not) as a thank you to the developers for such a good job in the first place. Grizzly Labs also provide versions of the app for Android and Windows Phone.
Genius Scan: Aptly Named App with some Excellent OutputWhen OS X was updated to 10.2, Jaguar, there was a fairly large introduction at the SIma Discovery Centre and at 6pm we all lined up and the boxes started to be sold. I was out of there by about 18:20 and off home to install. Before this, however, there was time for socializing and I had a chat with George Mann who had written the first Mac columns in the Bangkok Post Database. I was complaining that, having switched to OS X, the scanner I had bought had not driver, so to capture anything I had to switch back to System 9. "Why bother?" he asked, "Most images we need can just be taken with a camera and cropped."Depending on how the scanned image is going to be used, this is a reasonable approach and makes do for a lot of documents: when some bills are paid, for example, the company sending the bill wants a copy of the pay-in slip, so I use this method. My Nikon was a bit heavy for many of these quick snaps, but the iPhone allowed me to get a fair shot and that was usually adequate. It had the advantage that I could send the image directly from the device by email. Unless one is super-steady and accurate with the downward view there is always some distortion. For most cases this will not matter. However, I have found a useful free app, Genius Scan, which does a surprisingly good job and it has a couple of nice surprises built in. When opened, there are two sources available: camera and library. With the camera, I held the iPhone above a text and when ready pressed the button. The flash was used for longer than I expected and an image was captured. The preview displays two options: retake or use.
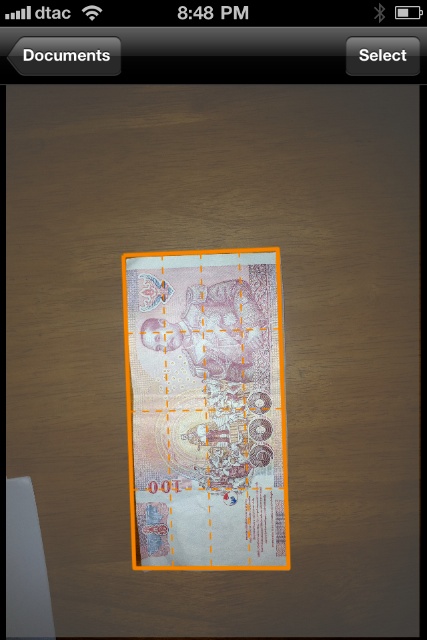
I tried this app with several types of input, starting with the Sunday newspaper and its crossword (it may take me a few days). I was not concentrating on this and the image was taken at an odd angle, but the software fixed the rotation, cropped accurately and produced a fair scan of the original. I tried also with a 100 baht note at an angle on a table. It cropped properly, fixed the angle and (in enhancement) smoothed out some of the creasing. An old book with browned pages was also accurately rendered, although this was where there was some shadowing introduced at the corners: nothing more than some Xerox or fax machines might do. On the iPad 2, results were not as good and the accuracy was considerably less. Using the same page from a book I had to improve the lighting in the room before getting close to the output that the iPhone had produced. The app is not optimised for the iPad and displays in the x1 and x2 formats. I also found it less easy to make a scan with this because of its size. This app is far better suited to the smaller device.
In the Settings we may turn on wifi sharing so the document may be transferred directly to a computer quite easily. One of those that I did transfer was a PDF made from an iPhone capture of the screen while I was writing this article. When viewed in the browser on my Mac the text was easily readable and no words were missing. Much flexibility here. Other settings are for: default enhancement (Auto, None, Black and White, or Color); paper size (Letter, A4, Fit to Image; orientation (portrait, landscape); and export plugins - only Twitter is available. There is also an upgrade setting here. The pro app, Genius Scan + allows direct uploads to Dropbox, Evernote and Google Docs. It also removes the advertisements: a bar at the bottom of some screens. The app is from The Grizzly Labs.
CommentsBoth of these apps have a lot going for them as basic document handling software and will work on the iPad, iPhone and iPod touch. The newer of the pair has a few more features but needs the in-app purchase to clear watermarking while the free version of Genius Scan will work out of the box, while also has options when exporting PDF files for file size.In real terms there is very little in it and which app was chosen would be down to personal choice.
Graham K. Rogers teaches at the Faculty of Engineering, Mahidol University in Thailand. He wrote in the Bangkok Post, Database supplement on IT subjects. For the last seven years of Database he wrote a column on Apple and Macs. |
|

For further information, e-mail to

|

|


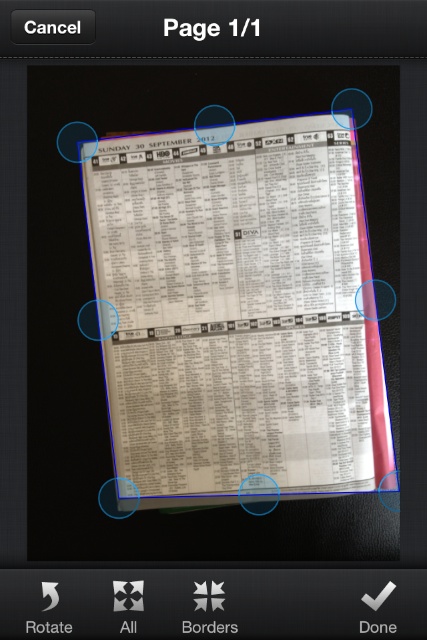

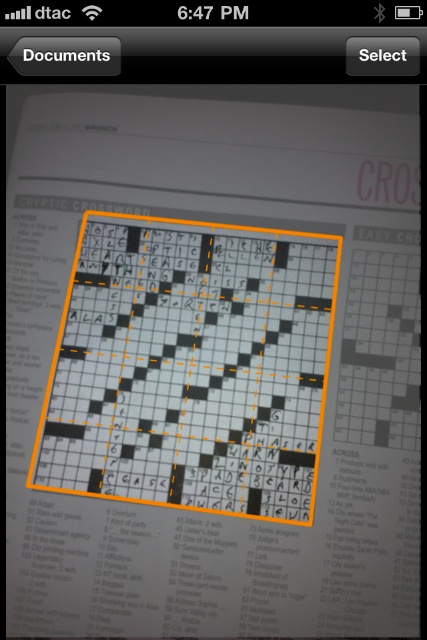 When we use an image, the app goes into "detecting" mode and the algorithm used puts an orange box fairly accurately round the text area. Using the touch screen we can move the four corners around to change the box size. When satisfied we press, Select. The area is cropped, perspective is fixed and the image is automatically enhanced. We may further enhance and there are three options available: none, black and white document, and color document. The black and white selection uses thresholding and if there is any shadowing it may show black.