System Preferences in OS X 10.8, Mountain Lion: Accessibility

AMITIAE - Tuesday 7 August 2012
|
System Preferences in OS X 10.8, Mountain Lion: Accessibility |
|
|
|
By Graham K. Rogers
There have been a number of changes to System Preferences in OS X 10.8, Mountain Lion. In earlier versions of OS X, Universal Access provided settings aimed at assisting the disabled. With the latest iteration of OS X, these settings have seen a major overhaul and are now available in the Accessibility preferences panel. There is a lot to digest here.
As each item in the left side window is highlighted, so the controls available are shown in the main panel. At the bottom of every pane are two checkboxes: Enable Access for assistive devices (e.g. special keyboards); and Show Accessibility status in menu bar. When the menu bar feature is on, as well as a an icon, turning a feature on shows a scrolling text for a short period.
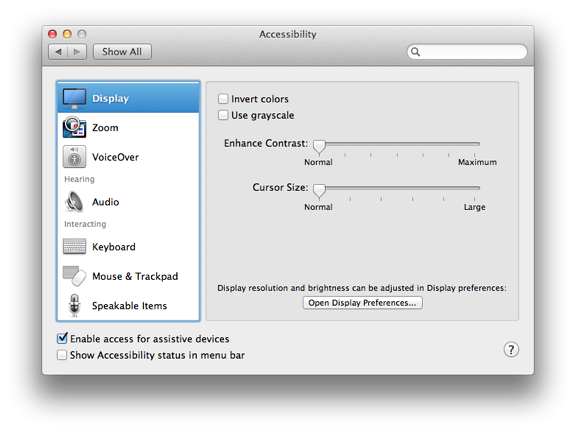
DisplayThe settings here are intended for those with vision problems. There are two checkboxes: Invert colors and Use grayscale. These features have been available since OS X first appeared although the "Invert" feature was previously called, "White on Black."In OS X 10.7 and before, it was also possible to invert the colors using the key combination of Control + Option + Command + 8 which is complex, although babies and cats seem to manage this with ease.
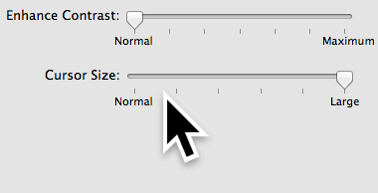
Below the checkboxes are two sliders: Enhance Contrast (Normal to Maximum); and Cursor Size (Normal to Large). The largest cursor is about 1" from end to end. Near the bottom of the panel is a button that opens Displays preferences.
ZoomThere are several ways to control the way users may use zoom in this panel. At the top is a checkbox (on by default on my computer) allowing a series of key commands to be used:
Below these key command options is a checkbox to allow the scroll gesture (2 fingers on a trackpad) to be used with a key to zoom in and out smoothly. This had been in the Trackpad preferences before and was sadly missed. The default key that this works with is Control, but Option and Command are also available. Two other checkboxes below are to turn on Smooth images (wise when zooming); and to Follow the keyboard focus. A button below these checkboxes allows options for the Zoom style. This is allows either a full screen zoom or "picture in picture" when a panel displays the section of screen zoomed, with the surrounding part not zoomed (I was unable to capture this with a screen shot).
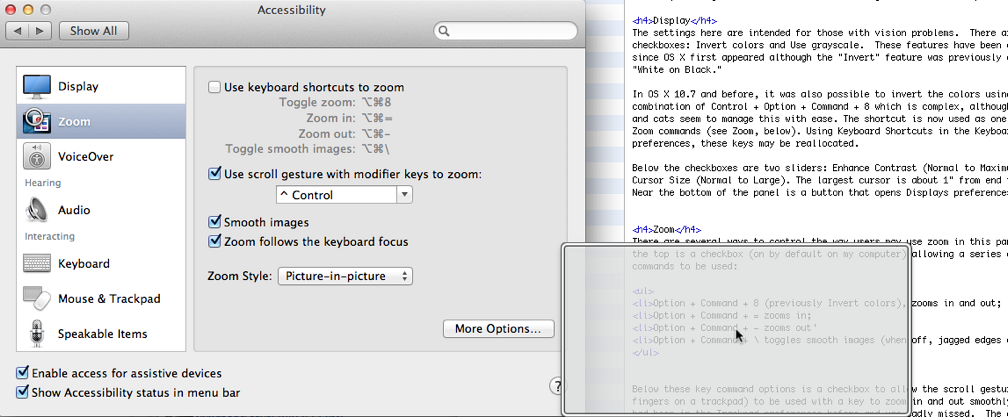
The screen shot shows the "picture in picture" panel but not the enlarged text within
VoiceOverThe panel has a text description of the purpose of VoiceOver: to provide spoken and brailled (sic) descriptions of what is on the screen and to help control the computer by the keyboard. There is a single checkbox: Enable VoiceOver. This may also be turned on using the Command + F5 keys.Near the bottom of the screen are two buttons: Open VoiceOver Training; and Open VoiceOver Utility. The training application reveals a large screen and the system voice reads out the training pages and talks the user through the operations. The voice was a little fast for my liking (certainly too fast for a non-native speaker), so I adjusted the speed down from Normal in the Text to Speech panel of Dictation & Speech preferences. Even so, it might take a couple of runs through to grasp the full idea.
AudioThere are two basic features here: a checkbox for "Flash the screen when an alert appears" (which I find useful anyway, for example in a meeting when I turn sound off); and Play stereo audio as mono. A button at the bottom of the panel accesses Sound Preferences.
KeyboardThis section helps a user adjust the keyboard so that those with certain difficulties may be able to type with a little less difficulty. There are two checkboxes in this panel: Enable Sticky Keys; and Enable Slow Keys. If a person is restricted to using a computer with one finger only, even typing a capital letter is a problem. With "Sticky Keys" and "Slow Keys", the Keyboard panel provides some solutions to those with limb-movement problems.
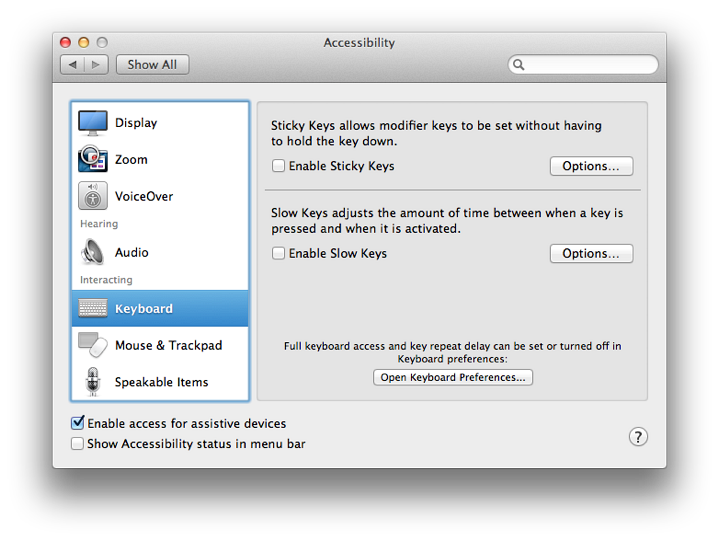
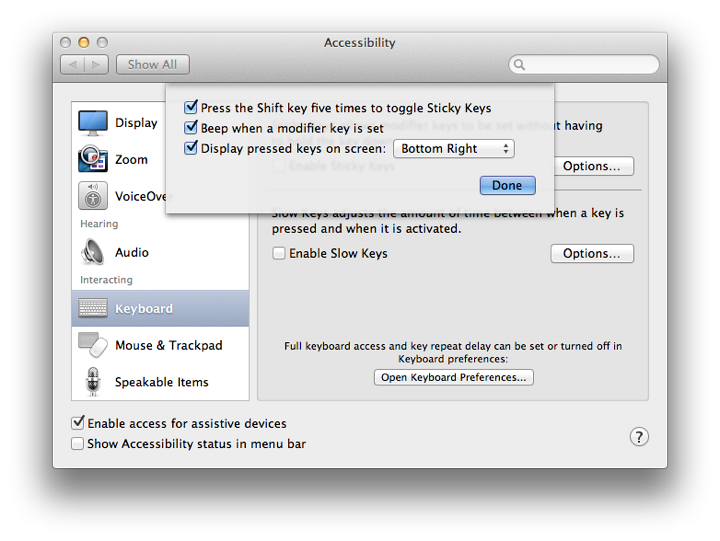
An Option button reveals a slider allowing the acceptance delay to be adjusted, so those with disabilities that make typing very slow can be accommodated. I found that moving the slider more than about 25% along produced a delay so significant I was not sure the keys were being recognised. To access more features, there is a button here that opens the Keyboard preferences.
Mouse & TrackpadThe panel is in two parts, separated by a thin line. At the top is a checkbox for Mouse Keys. When this is active, the cursor can be controlled using the number pad on the keyboard.

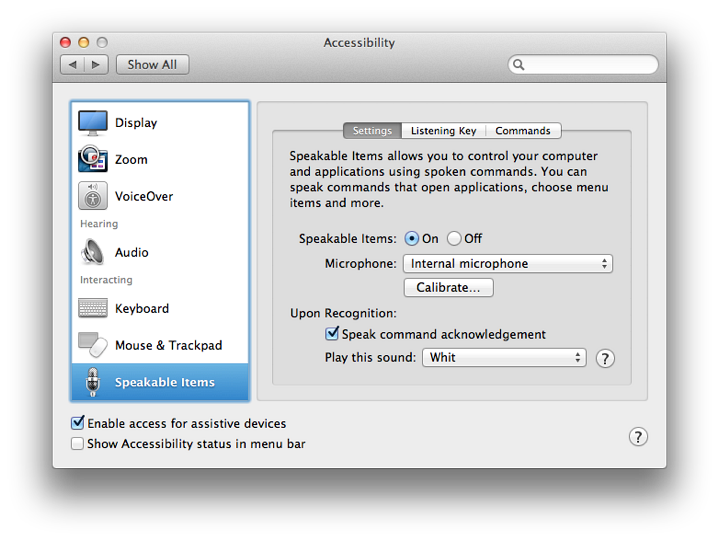
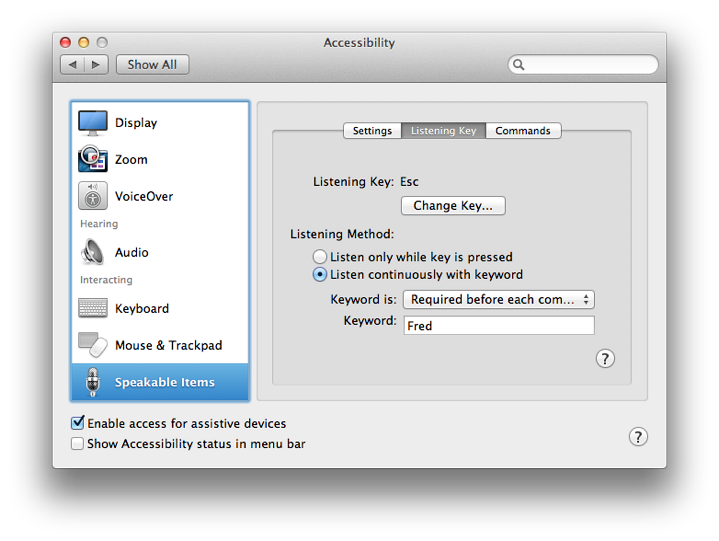
Speakable ItemsThe final panel is designed to allow control of the computer using voice. Since this first appeared, I have had limited success with this (but then Siri ignores me as well). There are three panels here: Settings, Listening Key and Commands.

CommentsThis renaming of the former Universal Access preference pane and the inclusion of some features that had been in other preferences, may create slight confusion initially (I cite the two-finger scroll as my personal best example here). However, this does provide a certain consolidation to the ways specific features that are of use to those who may suffer disabilities are now made available in an easily referenced way using the side window with clear icons for each feature.Whether all users will warm to the way this has been done, and to the considerable number of other changes that have occurred in System Preferences, time will tell. Experience suggests that once the feature is found and used, the perceived difficulties are reduced.
Graham K. Rogers teaches at the Faculty of Engineering, Mahidol University in Thailand. He wrote in the Bangkok Post, Database supplement on IT subjects. For the last seven years of Database he wrote a column on Apple and Macs. |
|

For further information, e-mail to

|

|

 The shortcut is now used as one of the Zoom commands (below). Using Keyboard Shortcuts in the Keyboard preferences, these keys may be reallocated.
 With the addition of Slow Keys, a delay is introduced for difficulties with initial or repeated keystrokes. Rather than simply tapping a modifier key as in touch typing, the key remains active and a second Key (or more) may be pressed. As an example I pressed Command then Shift, and then 3 to take a screen shot using one finger only. There is a short mechanical sound when the key is pressed and another when it appears on the screen.
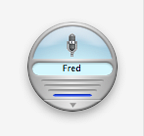 When the latter is active, a Keyword option is used: Optional, before each command, 15 seconds after or 30 seconds after the last command. A panel below is for a user-specified keyword. I typed in "Fred" when I was using OS X 10.5, Leopard and that remains the keyword still.