Gifmator: Quick Production of Animated GIFs on iOS Devices
AMITIAE - Friday 16 March 2012
|
Gifmator: Quick Production of Animated GIFs on iOS Devices |
|
|
|
By Graham K. Rogers
BackgroundMost of the images I take as photographs are in RAW format on my DSLR camera, or JPG with the iPhone. I save a number of the photographs in TIFF and PNG (Portable network graphics) which was developed to replace GIF and TIFF.The GIF was first used around the late 1980s and was originally developed by Compuserve, a major online service before AOL and before the internet really got off the ground. When the world wide web started, one of the main image formats was GIF although JPG and PNG have now taken over for many purposes. One thing that PNG cannot do (and JPG never could) was to allow animated images. These are still quite widely used (sometimes over-used). The animations can be made using several applications. This week, I discovered a simple app for the iPhone that will do this as well: Gifmator, from Dan Williams and Radius. It also works on the iPod touch and the iPad. It was not optimised for the iPad and displayed in the x1 and x2 modes. I did all testing on the iPhone.
GifmatorLike many of the best apps, Gifmator does one thing and does it fairly well for the small layout of $0.99. It does, however, have a number of ways to produce the animated GIF output.The app opens with a pleasant grey (linen) finish with three options:" Create new animation, View created animations and Gifmator help. The Help file is a beautifully finished ebook that explains what a GIF is and how Gifmator works. The information appears to be borrowed from the Wikipedia entry on GIFs. There is a useful, if slightly long text explanation of how the app works. The option for viewing animations will not work until at least one has been created and a warning appears.
The tools at the bottom of the screen are an arrow to take us back to the start page, a book icon for access to the Help information, a gear-wheel for settings and a check icon. This cannot be used until an animation with more than two frames is created. Pressing the large + icon to the right brings up the camera screen with flash On/Off and back/front camera controls. To the left is an arrow to take us back to the previous screen. To the right, the camera icon. Pressing this takes one photograph and the image is lined up. The + icon appears again. It is necessary to press this once more to bring up the camera and take a second image and the same for the third and so on. Tapping any image in the line displays 3 icons: a film roll that allows normalisation of all frames when pressed; a double-arrow to make the image full screen; and a trash icon to remove the specific frame from the line.
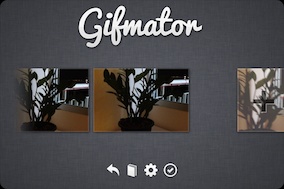
The completed animations are available in a gallery. Double tapping displays each one full screen. Below the file at center-screen is a trash icon for those we do not want, and an export icon allowing us to send a file to Facebook, Twitter, Tumblr, by email or by a message: the file is copied to the clipboard and can then be pasted into a message panel. With larger files I was given an option of large or small files (see below). The two files I created using the _ icon and taking pictures myself were 335KB and 282KB so easy to handle. There are two other methods to create animated GIFs with this app, accessed by pressing and holding that large + icon. A new panel appears with two options: Import from Library and Record Video. From the Library I selected 4 images that were taken at the same location but were not close in terms of actions. I also took a group of 5 images of a friend as a second try. With both, the app produced a reasonable animation of the scene. The maximum number of photographs that could be used when accessing the Photo library is 5. With the other option -- record a video -- the camera screen appeared with the record button, the front/back icon and the flash icon on Auto. The first time I tried, the flash operated and light was reflected back into the camera. When I tied a second time with the same scene, I turned the flash off and the result was much better. Some scenes of course will need the flash for illumination. After a few seconds of recording we may stop the recording and have the options: Retake or Use. If Use is selected, a number of frames are extracted from the video for the animation. The separate images are then processed.
CommentsThe app is a really quick way to make GIF animations directly on the iPhone without the need for really expensive additional hardware or softwareThe animations I made taking photographs myself via the app suffered from being a little shaky. More practice, a steadier hand, a little more patience could each have made these better. With animations created from movie input, there was less evidence of camera shake but the output, selected from a series of frames produced larger files. When emailing, there were options for Large or Small, however the smaller output produced a single image (34KB) that was not animated. I tried this a couple of times and had the same result. A middle ground -- the ability to select output sizes -- might be preferable.
Graham K. Rogers teaches at the Faculty of Engineering, Mahidol University in Thailand. He wrote in the Bangkok Post, Database supplement on IT subjects. For the last seven years of Database he wrote a column on Apple and Macs. |
|

For further information, e-mail to
|

|